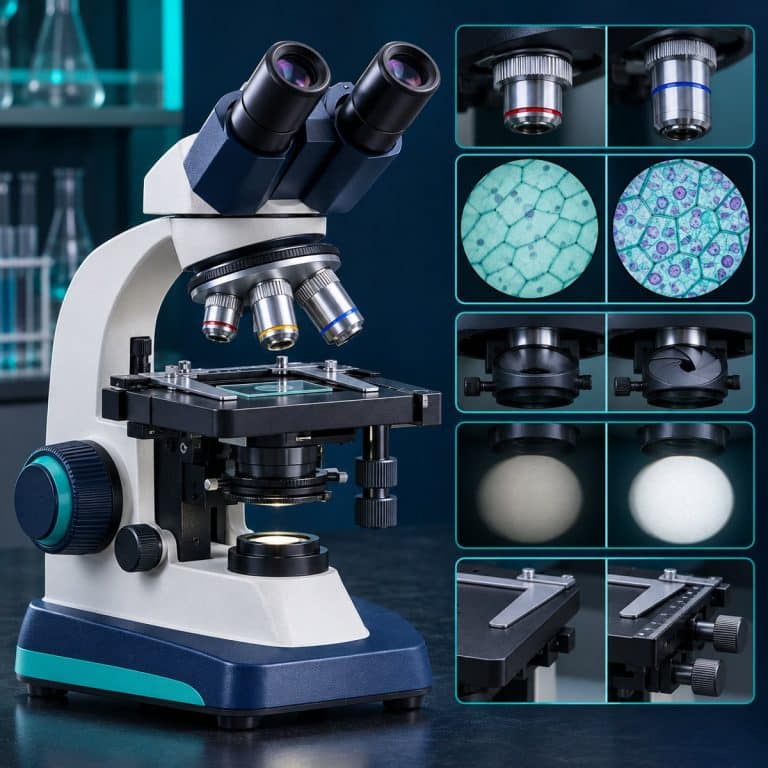
How to choose a microscope starts with one question: what do you want to look at? Cells and pond water call for a compound microscope; solid objects like insects, coins and circuit boards call for a stereo microscope. Either way, check the optics, condenser, focus, stage and head before you glance at the magnification number. Skip any listing that promises more than about 1000x, because past that point you get a bigger blur, not more detail.
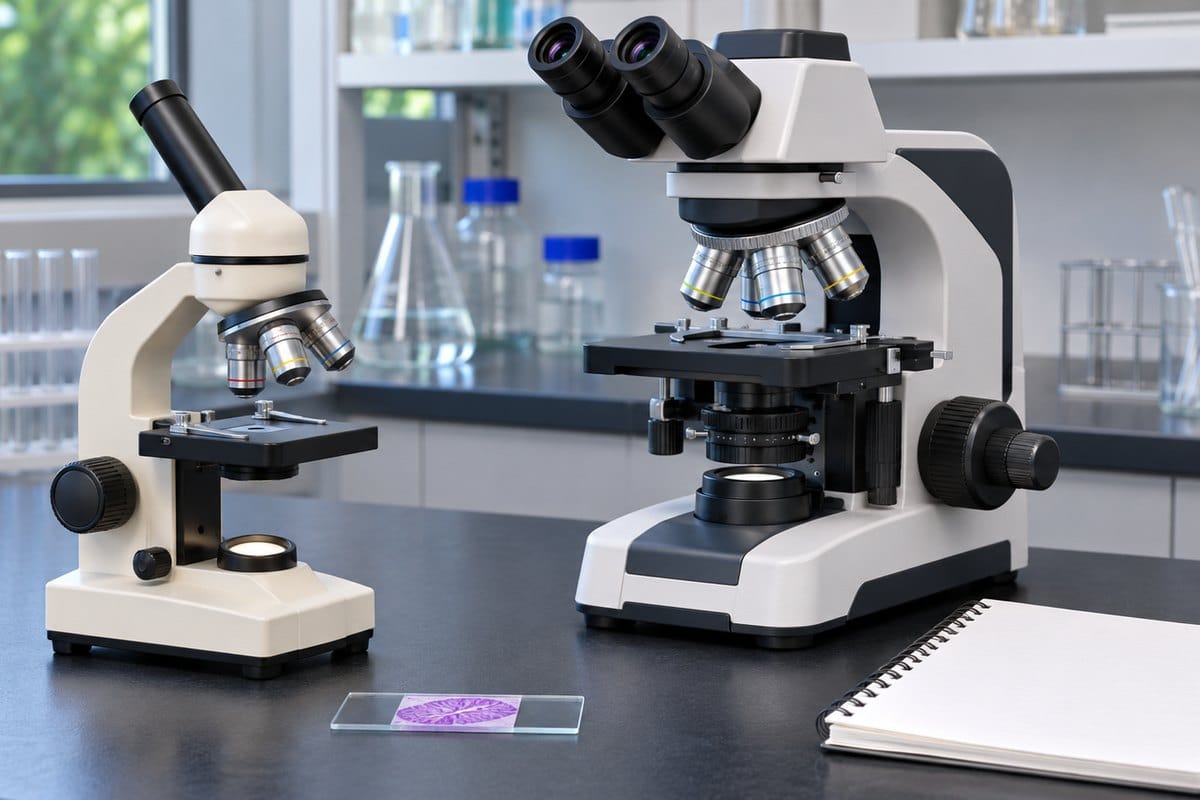
Start With What You Want to Look At
The microscope type decides everything else, because each design is built for a different kind of specimen. Buy the wrong type and no spec upgrade fixes it. Our guide to the different types of microscopes covers the whole family; here is the short version for buyers. See Nikon’s objective specification guide for additional context.
- Compound (light) microscope: sends light up through a thin, mostly transparent specimen on a glass slide. Typical powers are 40x, 100x, 400x and 1000x. Use it for cells, microorganisms, pond water, blood smears and prepared slides. The image is flat, and it is flipped upside-down and reversed.
- Stereo (dissecting) microscope: uses two separate optical paths, one per eye, to give a true 3D view of solid objects, usually lit from above. Typical power is about 10x to 40x (about 7x to 45x on zoom models) with a long working distance, roughly 3 to 4 in (75 to 100 mm) on common models. The image is upright and not reversed.
- Digital (USB or LCD) microscope: a camera sensor sends the image to a screen, computer or phone. Real optical magnification on most handhelds is low, roughly 10x to 200x. It suits inspection, coins, soldering and showing a group what you see.
- Pocket microscope: a handheld scope of about 20x to 120x with a battery LED, made for field use and kids. Hand shake and a tiny field of view are its limits.
The difference shows up the moment you put a specimen under each one. At 20x on a stereo scope, a housefly is hairy, metallic and three-dimensional, with eyes like a honeycomb of tiny domes. Slide the same fly under a compound microscope and you get a black silhouette, because the light has to pass through the specimen and a fly is not see-through. If you are torn between the two, our compound vs stereo microscope comparison walks through it, and how a stereo microscope works explains the optics.
A binocular microscope is not the same thing as a stereo microscope. A binocular compound has two eyepieces, but both eyes see the same image through one objective, so it is more comfortable and not 3D. Only a stereo microscope gives real depth. This is the single most common mix-up in buyer questions.
Specialized designs such as inverted, polarizing, metallurgical, phase contrast and darkfield microscopes are not first purchases. If you are curious where they fit, see brightfield vs darkfield vs phase contrast, then come back to the basics below.
Match the Microscope to the User: Kids, Students, Hobbyists and Inspection
The right microscope depends on who is using it, what goes under the lens and how long they will sit at it. Find your row in the table, note the type and the must-have specs, then follow the link to the roundup for that use case. See Nikon’s objective property guide for additional context.
| Who or what for | Best type | Look for / skip |
|---|---|---|
| Young kids (about 5 to 8) | Low-power stereo, or a sturdy pocket scope. See the best microscopes for kids and the best pocket microscopes for field use. | Look for: upright 3D image, 10x to 40x, LED, simple focus, durable body. Skip: “1200x” plastic compound kits. |
| Older kids and middle school | Entry-level compound or stereo | Look for: glass optics, 40x to 400x, LED, coarse and fine focus. Skip: mirror illumination, a single focus knob, plastic lenses. |
| High school and college biology | Compound | Look for: 4x/10x/40x/100x oil DIN achromat objectives, Abbe condenser (NA 1.25) with iris, mechanical stage, coarse and fine focus, LED. Skip: disc diaphragm only, “2000x” eyepieces. |
| Hobby biology (pond water, protozoa) | Compound with a binocular head. See the binocular compound microscopes we compared. | Look for: everything in the row above, plus comfort for long sessions. You can add darkfield or phase contrast later. Skip: a monocular head if you plan long sessions. |
| Insects, plants, rocks, coins, stamps | Stereo. See our dissecting microscope picks. | Look for: 10x to 40x (or 7x to 45x zoom), top and bottom light, generous working distance. Skip: a compound scope, the wrong tool for solid objects. |
| Electronics, soldering, jewelry | Stereo zoom on a boom stand, or a digital LCD microscope. See our best digital microscopes roundup. | Look for: long working distance, ring light, rigid stand. Skip: short-working-distance handhelds. |
| Classroom sharing and recording | Trinocular compound with a camera, or digital. See trinocular microscopes for camera work. | Look for: a camera port, real sensor resolution. Skip: digital-zoom “1000x” claims. |
| Lab, clinical, advanced hobby | Compound with plan achromats and infinity-corrected optics | Look for: Köhler illumination, trinocular head, quality mechanical stage. Skip: toy-grade frames. |
Stereo scopes are the easiest win for children under about 8. There is no slide prep: put a leaf or a coin under it and it just works, which is exactly what keeps a young kid interested. A compound scope only pays off once someone is ready to make wet mounts and handle glass slides.

The Buyer’s Checklist: 9 Specs That Actually Matter
Nine specs separate a microscope you will use for years from one that ends up in the closet. Check any listing against them in order. Each item below gives you what to look for and the red flag that should make you move on. The list is written for compound microscopes; extra checks for stereo and digital scopes follow later.
1. Glass, DIN-Standard Objectives With the NA Printed
Objective lenses do the real optical work, so they are the first thing to check. Look for glass achromatic objectives with the numerical aperture (NA) engraved on the barrel, for example “40/0.65”. Typical achromat values are 4x/0.10, 10x/0.25, 40x/0.65 and 100x/1.25 (oil). “Achromat” means the lens is corrected for two colors, which is the minimum standard. “Semi-plan” or “plan” means a flatter field, so the edges stay sharp. For a closer look at what each lens does, read what each objective lens (4x, 10x, 40x, 100x) does and what numerical aperture means.
DIN-standard objectives use a common thread and size (the RMS thread, 0.8 in), a 45 mm parfocal distance, and either a 160 mm tube length or infinity-corrected optics. In practice that means objectives are replaceable and parfocal, so the image stays roughly in focus when you rotate the nosepiece. It is also your cheapest upgrade path later.
Red flags: plastic lenses, no NA marking, and objectives you cannot unscrew.
2. A Condenser With a Real Iris Diaphragm (Not a Disc)
The condenser focuses light onto the specimen, and the iris diaphragm controls contrast and the cone of light. For 400x to 1000x you want an Abbe condenser with NA 1.25, an adjustable iris and ideally height adjustment. The condenser NA must match or exceed the objective NA before the 100x can perform properly. Our guides to what the condenser does and the iris diaphragm show how each one is set.
The iris matters more than most beginners expect. Crank the LED up on an unstained cheek cell and it vanishes into white glare. Close the iris a little and the cell reappears as a faint outline with a gray dot for a nucleus. A scope with no iris cannot do that.
Red flags: a rotating disc of holes instead of an iris, or no condenser at all. Budget scopes with only a disc diaphragm starve the 100x objective of light, so a “1000x” label on them means little.
3. LED Illumination You Can Dim
LED illumination runs cool, lasts tens of thousands of hours and is gentle on live samples, which makes it the default choice today. Halogen gives a warmer, more natural color and is very bright, but it gets hot and the bulbs wear out sooner. A mirror depends on room light and shows up on toy and very young kids’ scopes. Whatever the source, look for variable brightness, because the right light level changes with every objective.
Higher-end compounds add Köhler illumination, a field diaphragm that gives even, glare-free light; if you are heading that way, see our Köhler illumination setup guide. Stereo scopes should have both top (incident) and bottom (transmitted) light, or accept a ring light.
Red flags: fixed-brightness lighting or a mirror on anything above kids’ toy level. Battery-powered LEDs also tend to fade within a session, and plug-in power is steadier.
4. Separate Coarse and Fine Focus, With a Rack Stop
Coarse and fine focus knobs are what let you land on a sharp image at high power. Look for separate coarse and fine knobs, ideally coaxial, with a tension adjustment and a rack stop that limits how far the stage can rise. At 400x the depth of field is only a few microns, so a coarse-only knob simply jumps past focus. The rack stop protects slides and objectives from a crunch.
Red flags: a single focus knob on anything above 100x. A stage that slowly drifts down on its own points to no tension adjustment or worn plastic gears.
5. A Mechanical Stage
A mechanical stage holds the slide and moves it with X and Y knobs. It matters because the view at 400x is a bright circle less than half a millimeter across. Nudge the slide by fingertip and the specimen is gone. A paramecium can cross the whole view in about a second, and without a mechanical stage you chase it by pushing the slide, then overshoot every single time. Our page on field of view explains why the view shrinks as power rises.
Red flags: plain stage clips only. Skipping the mechanical stage to save money is a false economy, because it matters most past 100x, where most of the fun is.
6. Monocular, Binocular or Trinocular Head
The head type sets how comfortable the microscope is over a long session. A monocular head is the cheapest and fine for kids and occasional use. A binocular head cuts eye strain on longer sessions. It does need an interpupillary distance adjustment (typically about 48 to 75 mm) and a diopter ring. A trinocular head adds a third port for a camera.
Set up wrong, a binocular head shows two overlapping circles and brings eye strain within minutes. Set the eye spacing and the diopter ring once and the circles merge into one image. Better binocular heads use a Siedentopf design that keeps focus when you change eye spacing; cheaper sliding heads may need refocusing. A 360° rotating head inclined at 30° or 45° is standard on decent models. See the binocular compound microscopes we compared for options.
If you want to photograph or share what you see, decide before buying. A trinocular port is far better than holding a phone to an eyepiece, and our roundup of trinocular microscopes for camera work shows what is available.
Red flags: a monocular head for someone who plans hour-long sessions, and a binocular head that was never adjusted.
7. Eyepieces: Wide-Field 10x, Field Number 18 or More
Eyepieces are the cheapest part to get right and one of the easiest to get wrong. Wide-field (WF) 10x is the standard, with a field number of 18 mm or more. Glasses wearers should look for high-eyepoint eyepieces, or take the glasses off and use the diopter ring instead.
Red flags: included 20x or 25x eyepieces. They exist to justify big headline claims, not to improve what you can see.
8. Spring-Loaded 40x and 100x Objectives
A spring-loaded (retractable) objective pushes back if it touches the slide instead of cracking it. The classic cause of cracked slides at 40x and 100x is a rigid objective combined with a fast coarse-focus knob. Spring-loaded high-power objectives plus a rack stop prevent nearly all of it, which saves you slides, coverslips and sometimes the lens itself.
Red flags: a rigid 40x or 100x barrel on a scope with no rack stop.
9. Build Quality and Parts Support
A metal frame and metal gears make a microscope heavier and steadier, and standard parts keep it repairable. Check that replacement bulbs and objectives exist, and look for a warranty and real customer support. Many low-cost listings share near-identical frames, so reviews are where unit-to-unit problems show up. In our reviews, dead-on-arrival units, dead LEDs and loose knobs recur across low-cost listings, so buy from a seller with an easy return path. For a look at who builds what, see how the major microscope brands compare.
Red flags: a plastic frame, proprietary parts you cannot replace, and no warranty.
Seeing these features on a real instrument helps them click. Oliver Kim of Microbehunter walks through the condenser, objectives, focus, stage and DIN standard in this video, and his written microscope buying guide covers the same ground.
You can also check unfamiliar part names against our guide to the parts of a microscope.
Why “2500x” Is a Red Flag: Magnification vs Resolution
Magnification makes the image bigger, while resolution decides whether the bigger image contains any extra detail. Total magnification equals eyepiece magnification multiplied by objective magnification, so a 10x eyepiece with a 40x objective gives 400x. Barlow and auxiliary lenses multiply it again. If you want to check a listing yourself, see how to calculate total magnification.
Resolution depends on numerical aperture and the wavelength of light. The Abbe limit is d = λ / (2 × NA). With green light at about 550 nm and an NA of 1.25, d is about 0.22 µm, and the practical limit of any light microscope is about 0.2 µm (200 nm). Higher NA means finer detail, which is why Lab Manager’s explainer on why NA matters more than magnification is worth a read. Our own page on magnification vs resolution goes deeper.
This leads to the rule that exposes most inflated listings:
Useful magnification ≈ 500 × NA to 1000 × NA. Anything above that is empty magnification: a bigger image with no added detail, like enlarging a blurry photo.
Here is the rule applied to three objectives:
- 100x oil objective, NA 1.25: useful range is about 625x to 1250x, so the ceiling is about 1250x. A “2500x” or “2000x” claim, usually made with a 20x or 25x eyepiece or a 2x Barlow lens, is double what the optics can resolve.
- 40x objective, NA 0.65: useful range is about 325x to 650x. A 10x eyepiece gives 400x, which is in range. Pair the same objective with a 25x eyepiece and the 1000x you get is empty.
- 10x objective, NA 0.25: useful range is about 125x to 250x. A 25x eyepiece reaches 250x, right at the ceiling. Add a 2x Barlow lens on top and the 500x you get is empty.
You can see empty magnification with your own eyes. On a “1200x” kids’ kit at top power, the image is a big, bright, mushy blob: larger, but no clearer than at 400x. Our hands-on write-up of a 1000X claim that didn’t hold up in testing and the review showing when 1000X is really digital zoom are good examples to compare against any listing you are considering.
True 1000x needs a 100x oil-immersion objective and a drop of immersion oil, which has a refractive index of about 1.515 to match glass. Run the 100x dry and the image is dim, milky and soft, like looking through a fogged window. Add one drop of oil and the same field snaps into crisp edges. Our page on immersion oil for the 100x objective covers how to apply it.
Field of view shrinks as power rises. Field of view equals the eyepiece field number divided by the objective magnification, and with an FN18 eyepiece it works out like this:
| Objective | Field of view (FN18 eyepiece) |
|---|---|
| 4x | about 4.5 mm |
| 10x | about 1.8 mm |
| 40x | about 0.45 mm |
| 100x | about 0.18 mm |
Higher power also means a dimmer view and a shallower depth of field. In school and hobby biology most viewing happens between 40x and 400x, and you only need 1000x for bacteria, blood-cell detail and stained smears. Judge a scope by how good its 10x and 40x look, not by its top number. For a deeper dive into the physics, Nikon’s MicroscopyU hosts extensive optics tutorials.
Extra Checks for Stereo and Digital Microscopes
Stereo and digital microscopes have their own spec lists, and the compound checklist above only partly applies. Use the checks below on top of it.
Stereo microscope checks
- Zoom or fixed turret: a zoom model (for example a 0.7x to 4.5x zoom with a 10x eyepiece, giving 7x to 45x) lets you frame the subject continuously. A fixed turret has fewer moving parts and costs less.
- Working distance: more is better for soldering and dissection, because you need room to get tools under the lens. An auxiliary 0.5x Barlow lens halves the magnification and roughly doubles the working distance.
- Stand type: a pillar stand suits a desk. A boom stand reaches over large objects such as circuit boards.
- Lighting: top and bottom light, or a ring light.
- Optical design: most hobby and education scopes are Greenough (two tilted optical paths). Common main objective (CMO) designs use one large front lens, work better with cameras and add-ons, and usually cost more.
See our dissecting microscope picks for shortlisted models.
Digital microscope checks
- Real sensor resolution: look for the true sensor figure, not an interpolated megapixel number. More megapixels do not mean sharper if the lens is the bottleneck.
- Frame rate: a smooth live view matters for focusing.
- Optical vs digital zoom: digital zoom only enlarges pixels.
- Stand rigidity: on a flimsy stand the image shakes every time you touch the focus wheel at high zoom.
- Software and device compatibility: iPhone and Mac support is a frequent failure point in our reviews. Check before you buy, and compare the WiFi microscopes that work with an iPhone.
- Screen size and power: LCD models vary in built-in screen size, and some units only reach top resolution when plugged in rather than running on battery.
For soldering, the trade-off is simple. A digital LCD microscope removes the eyepieces and makes sharing easy, but a stereo scope gives true depth perception, which is what hand-eye work really needs. Browse USB microscope options and our best digital microscopes roundup if you lean digital.
Mistakes First-Time Buyers Make
Most regret in this hobby traces back to five avoidable mistakes.
- Buying on the magnification number. Read the NA on the objectives and check for a condenser with an iris instead. Ignore anything above about 1000x.
- Buying a compound scope to look at bugs, coins or rocks. Solid objects need a stereo (dissecting) scope. The compound will show you a black silhouette.
- Buying a single-knob, plastic-lens kit “to start with.” The minimum worth owning is glass optics, coarse and fine focus, and LED light. Below that, kids lose interest because nothing ever comes into focus.
- Expecting a USB microscope to show cells. Digital scopes are for surfaces and inspection. Cells need a compound scope.
- Skipping the mechanical stage to save money. It matters most past 100x, which is where most of the fun is.
One more habit pays off: check the retailer’s perspective too. A supplier’s microscope buying guide is a useful second opinion on the same specs, and it helps you spot where manufacturers agree. Once your scope arrives, a stack of prepared slides worth buying gives you something to look at on day one.
Where to Go Next: Our Microscope Roundups
You now have the framework, so the next step is a shortlist. Pick the roundup that matches your use case:
- Kids and beginners: best microscopes for kids and best pocket microscopes for field use.
- Cells, pond water and long sessions: binocular compound microscopes we compared.
- Insects, rocks, coins and dissection: our dissecting microscope picks.
- Screens, inspection and sharing: our best digital microscopes roundup.
- Understanding who makes what: how the major microscope brands compare.
- Want the full type breakdown first? Start with compound light microscope basics or the different types of microscopes.
Frequently Asked Questions
What magnification do I need to see bacteria?
You need 1000x with a 100x oil-immersion objective, and the bacteria usually need staining to stand out. At 400x they show only as tiny dots. See what bacteria look like at 1000x for examples.
Can you see a virus with a light microscope?
No. Most viruses measure about 20 to 300 nm, which is below the roughly 200 nm limit of a light microscope, so you would need an electron microscope. Our post on why a light microscope can’t show viruses explains the limit.
Why does my image go out of focus when I switch to a higher objective?
A parfocal microscope should stay close to focus when you rotate the nosepiece, so at 40x and above you should only need the fine knob. If it does not, check that the slide sits flat on the stage with the coverslip facing up, and focus at 4x first, then step up one objective at a time. At 400x the depth of field is only a few microns, so a coarse-only adjustment jumps past focus. Our guide to how to focus a microscope walks through the full routine.
Should I buy a microscope kit or a standalone microscope?
Judge the microscope inside the kit by the same nine specs and ignore the accessory count. Slides, tweezers and sample vials are cheap to add later, while a weak microscope cannot be fixed. A kit makes sense, especially for a first-time young user, as long as the microscope itself passes the checklist.
Is a used microscope worth buying?
It can be, especially a well-built metal scope with standard DIN objectives. Before you commit, look through the lenses for haze or fungus, confirm that focus is smooth and holds its position, make sure no parts are missing, and check that replacement bulbs or lighting are available. Skip anything with damaged or loose optics.
Can I use my phone with a microscope?
Yes, with a phone adapter that holds the camera over the eyepiece. Alignment is fiddly and the image often vignettes. If you plan to photograph often, a trinocular head with a dedicated camera, or a digital microscope, is a much smoother route.
Is it safe for young children to use a microscope?
With supervision, yes. Kits often include small parts, glass slides and coverslips, so adults should handle those for young children. A low-power stereo microscope avoids slides entirely, which is why it suits the youngest users.
Conclusion
To recap how to choose a microscope: decide what you want to look at, match the type (compound for cells, stereo for solid objects, digital for inspection and sharing), then run the nine-spec checklist on every listing. Look for glass DIN objectives with the NA printed, an iris condenser, dimmable LED, coarse and fine focus, a mechanical stage and a head that suits your session length. Ignore the magnification number unless it fits the 500 to 1000 times NA rule.
Have you bought a microscope using a checklist like this, or been burned by a “2500x” listing? Tell us what you found in the comments below, and ask if you are stuck choosing between two types.