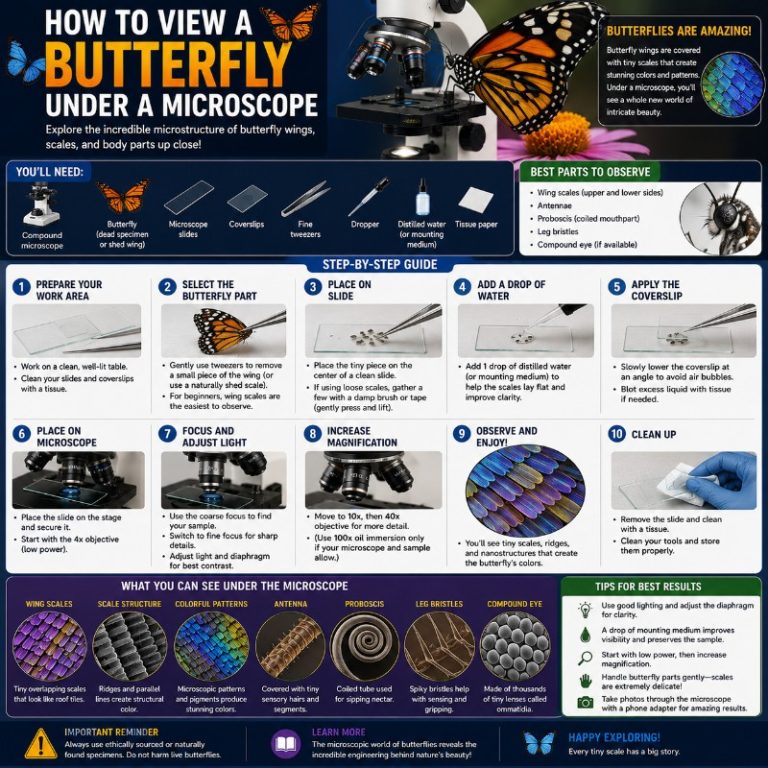
Knowing how to view a butterfly under a microscope opens up one of the most visually stunning specimens in amateur microscopy. Use a stereo (dissecting) microscope at 10–40x for whole structures like wings, the proboscis, compound eyes, and antennae, and switch to a compound microscope at 40–400x when you want to resolve individual wing-scale ridges or ommatidial detail. Most of the magic happens at low power — and you don’t need to harm a live butterfly to get started.
Quick-Start: Your First Wing Scale View in Three Steps
Start with the wing. Gently press a strip of clear adhesive tape onto a wing fragment from a found or deceased butterfly, lift it off, and stick it scale-side-down onto a glass slide. Place the slide under a stereo microscope at 20–40x. You’ll instantly see hundreds of overlapping scales arranged in neat rows, each one colored individually. That’s the fastest route to a jaw-dropping result. From there, you can mount the proboscis, an antenna, or a section of the compound eye and explore each structure at its ideal magnification. Everything below tells you exactly how.
What You’ll Need — Equipment and Materials
Stereo vs Compound Microscope — Which for Which Part
Butterflies are 3D, opaque, and delicate — the opposite of a typical compound-microscope specimen. A dissecting microscope guide will tell you that the stereo (dissecting) scope uses top/reflected light and gives a right-side-up, three-dimensional view. That makes it ideal for nearly every butterfly structure. A compound microscope transmits light through a thin, transparent specimen — useful for seeing fine scale surface texture at 100x–400x, but only after you’ve prepared a proper slide mount.
If you’re choosing one scope for this project, start with a best dissecting (stereo) microscope. For a head-to-head breakdown, see our compound vs stereo microscope comparison. Understanding the difference in magnification vs resolution will also help you set realistic expectations before you start.
Tools and Materials Checklist
- Stereo/dissecting microscope (10–40x) — primary tool
- Compound microscope (40–400x) — for scale detail
- Glass microscope slides and coverslips
- Clear adhesive tape (for tape-lift mounts)
- Fine-tipped forceps or tweezers
- Small fine-bristle paintbrush or artist’s brush
- Scissors and a fine needle or pin
- Water dropper or pipette (for wet mounts)
- Specimen — a deceased/found butterfly or a wing fragment
Choosing Your Specimen — Ethically
You do not need to kill a butterfly to study one under a microscope. The best sources for US hobbyists:
- Found specimens — butterflies that have died naturally (windowsills, gardens, outdoors). Wing scales are often intact even on older specimens.
- Butterfly gardens and breeders — many sell deceased specimens or shed wings specifically for educational use.
- Purchased pinned specimens — available from scientific supply companies like Carolina Biological or Ward’s Science.
- Shed scales and wing fragments — a gentle touch of tape or a fine brush on a found wing fragment lifts a few scales for study. This is the most minimal-impact approach and needs no whole specimen at all.
A conservation note: some North American butterfly species are protected or of conservation concern — the monarch butterfly (Danaus plexippus) is one high-profile example. Do not collect wild specimens of uncertain status. When in doubt, purchase preserved specimens or work with shed wing fragments.

How to Prepare and Mount a Butterfly Specimen
Tape-Lift Method for Wing Scales (Beginner-Friendly)
This is the easiest and most reliable method for first-timers:
- Tear a 1–2 inch strip of clear adhesive tape.
- Press the tape gently but firmly against a small area of the wing (top surface).
- Peel the tape off slowly — you’ll see a faint colored patch transfer to the tape. Those are scales.
- Lay the tape sticky-side-down onto a clean glass slide.
- Press flat and place under the stereo or compound microscope. No coverslip needed for a stereo scope; use a coverslip if viewing on a compound scope at high power.
You now have a dry mount of wing scales. This is ideal because it preserves the structural color — filling the nanoscale ridges with liquid would dull or eliminate the iridescence.
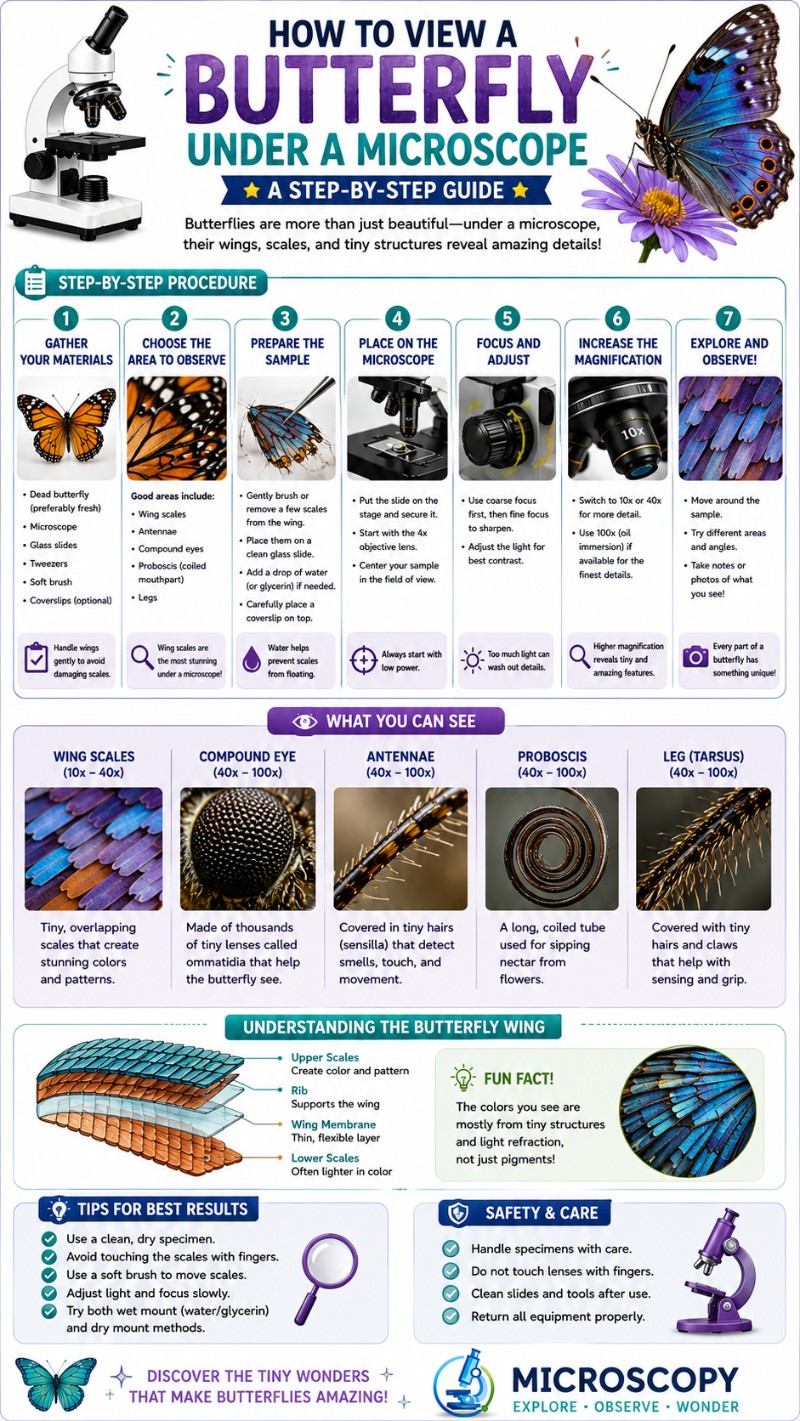

Dry Mount vs Wet Mount — When to Use Each
For tips on the full wet-mount technique, see our step-by-step guide on how to make a wet mount slide. In general:
- Dry mount — best for wing fragments and loose scales. No liquid, no coverslip required for stereo viewing. Preserves structural color and iridescence.
- Wet mount — better for soft structures like the proboscis or antenna, where a drop of water helps flatten and clarify the specimen. Use a coverslip. Note that liquid will diminish iridescent blues and greens on scales, because water fills the photonic nanostructures that produce those colors.
For more on preparing microscope slides in general, including which mounting media to use for permanent preparations, our full guide covers the options.
Mounting the Proboscis, Antenna, or Eye
These structures require a bit more care:
- Proboscis — use fine forceps to gently uncoil the proboscis from a deceased specimen and lay it on a slide. A drop of water helps it lie flat. Cover with a coverslip and view at 10–40x first to appreciate the spiral form, then increase magnification to see the interlocking galeae structure.
- Antenna — snip an antenna at the base with fine scissors. Lay it on a slide, add a drop of water and a coverslip. The clubbed tip (the “knob”) is most interesting at 20–40x on a stereo scope.
- Compound eye — the easiest approach for beginners is to simply view the intact eye on a whole head under the stereo microscope — no dissection required. For a compound-scope view of the facets, a very thin section is needed, which is advanced technique territory.
Magnification Guide by Body Part
This table shows recommended scope type, magnification range, and what you’ll actually see for each butterfly structure. It’s your quick reference before you sit down at the scope. For a deeper explanation of how objective lenses (4x, 10x, 40x, 100x) affect what you see, and how to calculate total magnification, those guides have you covered.
| Structure | Scope Type | Magnification | What You’ll See |
|---|---|---|---|
| Wing scales (overview) | Stereo or Compound | 20–40x | Overlapping shingle rows, individual scale shapes, vivid color |
| Wing scale surface detail | Compound | 100–400x | Nanoscale ridges and lamellae responsible for iridescent color |
| Proboscis (whole) | Stereo | 10–20x | Coiled spiral straw; two interlocking halves visible |
| Proboscis (detail) | Compound | 40–100x | Legulae (tiny hooks) that zip the two galeae halves together |
| Compound eye | Stereo | 20–40x | Hexagonal mosaic of ommatidia facets — honeycomb pattern |
| Antenna (whole) | Stereo | 10–30x | Clubbed tip, segmentation, sensory hairs (sensilla) |
What You’ll See — Butterfly Structures Up Close
Wing Scales — and Why They’re So Colorful
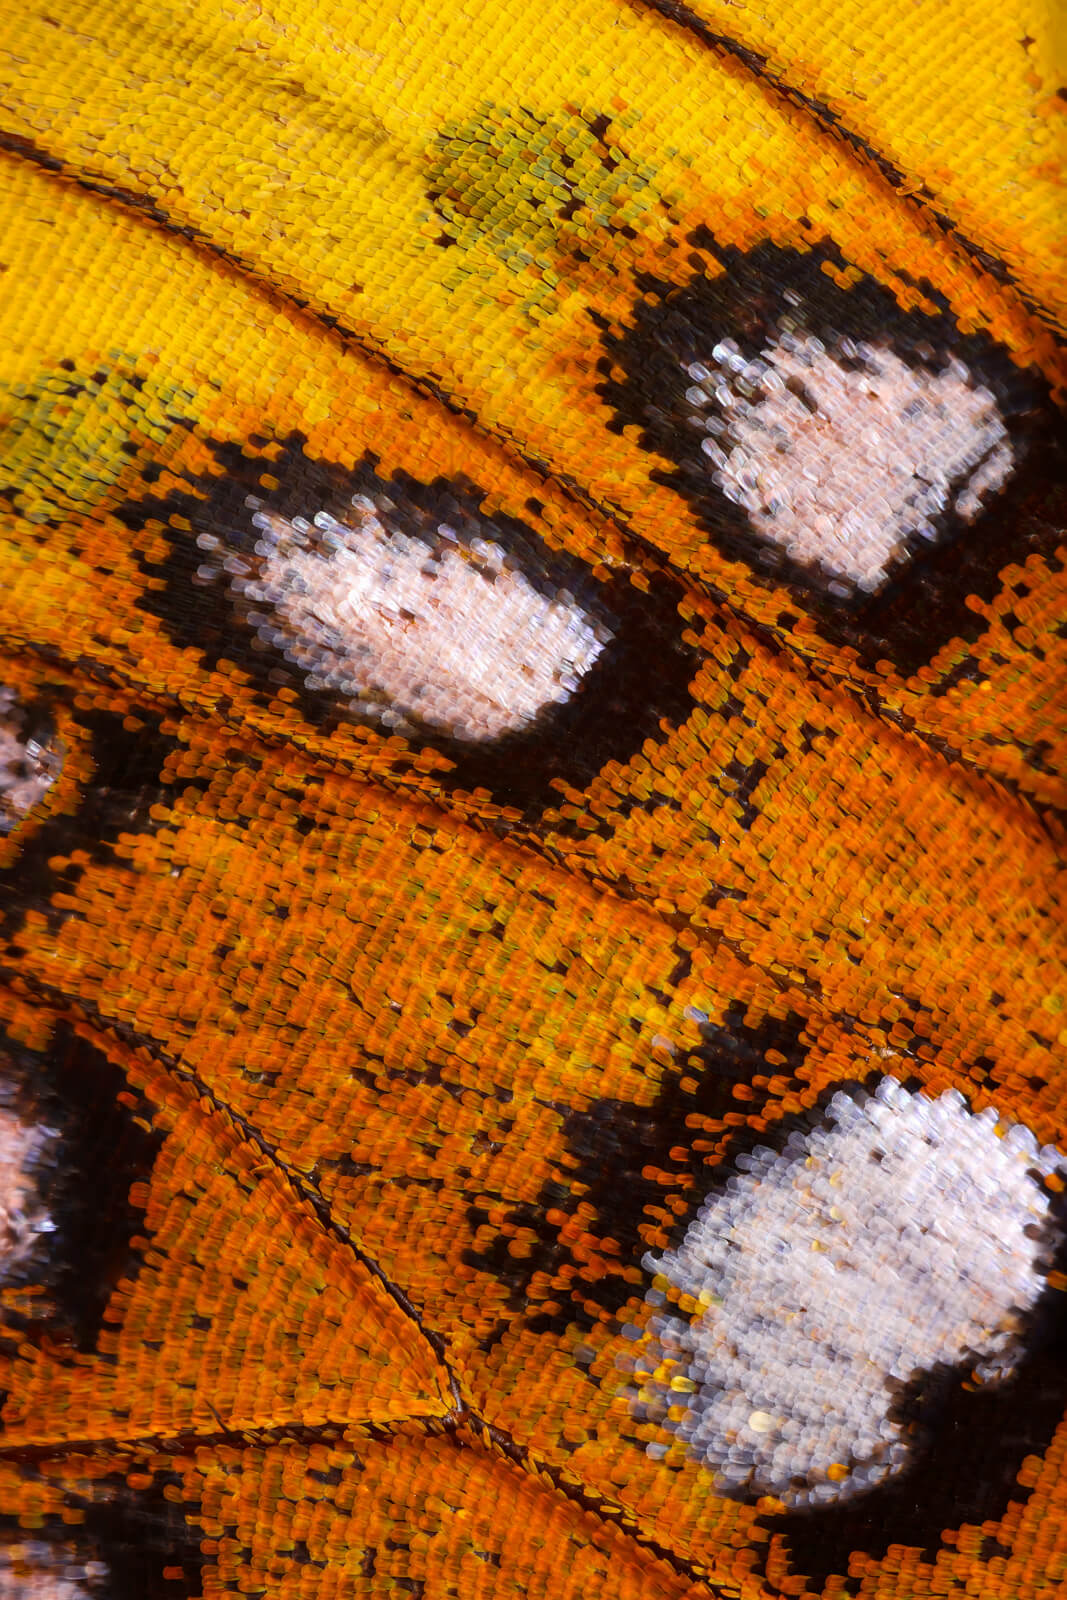
The iridescent “dust” that rubs off on your fingers when you touch a butterfly wing is not pollen or dirt — it’s wing scales, modified flattened hairs (setae) unique to the order Lepidoptera (Greek for “scaly-winged”). Each scale is roughly 50–150 micrometers (µm, also called microns) long — about the width of a fine dust particle — and they overlap in neat rows like shingles on a roof or scales on a fish. At 40x, the individual shingle shapes are immediately clear. At 100x–400x on a compound microscope, you can begin to resolve the nanoscale ridges and lamellae on the scale surface.
This is where a key misconception gets corrected: not all butterfly color comes from pigment. There are two entirely different mechanisms at work:
- Pigmentary color — browns, blacks, reds, and yellows come from actual pigment molecules embedded in the scales: melanins (browns and blacks) and pterins (whites, yellows, and reds, characteristic of the Pieridae family — cabbage whites, sulphurs, orangetips).
- Structural color — blues, greens, iridescence, and metallic sheens are produced by nanoscale physical structures on the scale surface that interfere with light waves (thin-film interference and photonic crystal effects). No pigment is involved. The classic example is the Morpho butterfly’s brilliant blue, which appears gray-brown in transmitted light because the nanostructures scatter rather than absorb light. This is also why iridescent scales shift color as you change the viewing angle — the interference pattern depends on the angle of the incoming light.
Practically speaking: always view wing scales under reflected (top) light to see structural color at its best. Transmitted light through a compound scope will show the scale shape and pigment, but the blues and greens may disappear entirely. You can read more about this phenomenon on ScienceDirect’s photonic crystal overview if you want the physics behind it.
The Proboscis — a Coiled Feeding Straw
The butterfly’s feeding tube is called the proboscis. It’s not a simple hollow tube — it’s formed from two modified mouthparts (the galeae, extensions of the maxillae) that interlock along their length via tiny hooks called legulae, creating a central food canal. At rest the proboscis is kept tightly coiled like a watch spring beneath the head; it uncoils elastically to sip nectar.
At 10–20x on a stereo scope, the spiral form is spectacular — it looks like a miniature coiled hose. Increase to 40x on a compound scope with a wet-mounted, uncoiled proboscis and you can often make out the seam where the two halves meet and individual legulae links along it. This is also where you can spot sensory pits near the tip that help the butterfly taste its food.
Compound Eyes — the Ommatidial Mosaic
A butterfly’s eyes are compound — made up of thousands of individual light-collecting units called ommatidia. Depending on species, a single eye may contain 6,000–17,000 ommatidia. Under the stereo microscope at 20–40x, the eye surface resolves into a striking hexagonal honeycomb mosaic, each hexagon being the lens facet of one ommatidium. The arrangement is remarkably regular and geometric.
Butterflies see a wide field of view with relatively low spatial resolution compared to a vertebrate eye, but they excel at detecting motion and color — including UV wavelengths invisible to humans. Their color perception involves more photoreceptor types than ours, which is reflected in the complex ommatidial structure. For a broader look at insect compound eyes under the microscope, including flies, dragonflies, and beetles, that article covers the full range of insect eye types and how to view them.
Antennae — Clubbed Tips and Sensory Hairs
Butterfly antennae are clubbed — each one ends in a thickened knob, which is one of the clearest ways to distinguish a butterfly from most moths (moths typically have feathery or thread-like antennae). Under 10–30x magnification on a stereo scope, the segmented shaft and the distinct club tip are obvious. At higher power you can see the surface is covered in tiny sensory hairs called sensilla that detect scent, pheromones, humidity, air currents, and even help with balance during flight.
The clubbed antennae are why butterflies belong to the informal grouping Rhopalocera, from the Greek for “club-horns.” Laying a whole antenna on a slide and viewing it under the stereo scope at 20x is a beautiful, low-effort preparation that reveals a lot of fine detail — and it’s a great follow-up specimen after the wing scales.
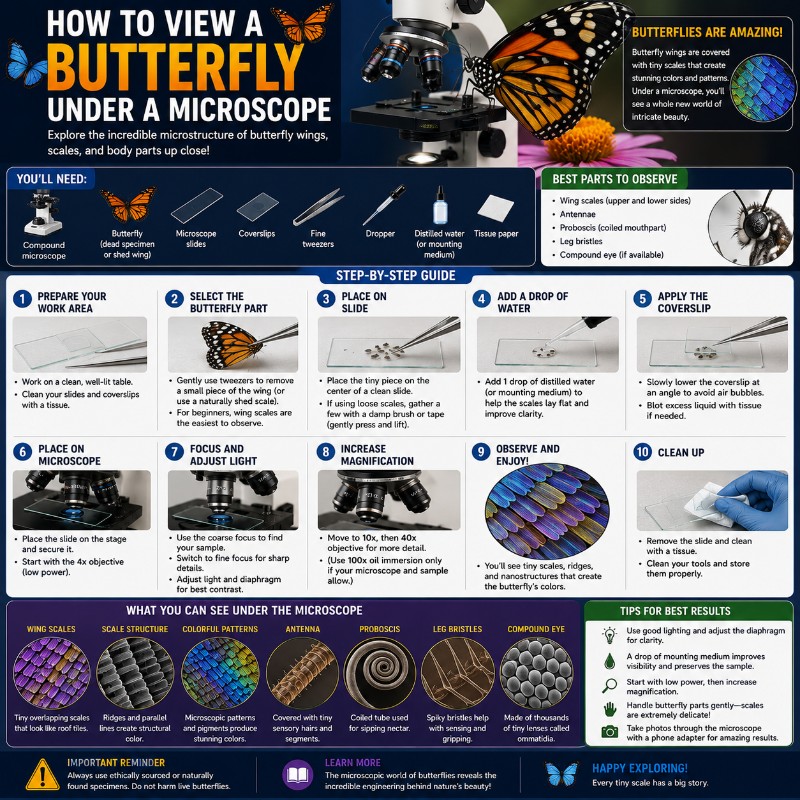
Tips for the Best View
- Use reflected light for wing scales. The structural color (blues, greens, iridescence) requires top lighting to show at its best. Transmitted light through a compound scope will reveal scale shape but may kill the iridescence. Most stereo scopes have a built-in ring light or overhead illuminator — use it.
- Minimize scale loss during preparation. Handle wing fragments at the cut edge with forceps, not the scale surface. Don’t breathe directly on the specimen — the airflow dislodges scales. Use a brush or tape lift rather than fingers whenever possible.
- Start at the lowest magnification, then work up. With a stereo scope, dial to 10x first to locate your specimen and center it, then increase. Coming in at high power with a delicate 3D specimen is a common mistake. Our field of view guide explains why lower magnification gives you more room to work.
- 3D specimens and depth of field. A whole butterfly eye or proboscis has significant depth — you’ll need to focus through different layers. Understanding depth of field helps you know when you’re seeing all the detail available at a given magnification.
- Tape down or weight your slide. Light wing fragments and loose tape-lift slides can shift under the scope as you adjust focus. A small piece of putty or a second slide resting over the edges helps keep everything still.
- Photograph at each stage. Wing scales under a phone camera held to the eyepiece produce surprisingly good results. Capture the full wing scale view at 40x, then ramp up — the ridged textures at 100x are a different photo entirely.
If you enjoy insect microscopy in general, viewing ants under the microscope is another rewarding project — their mandibles and leg segments reveal detail as striking as anything on a butterfly. And if you explore the proboscis’s role in nectar feeding, mounting pollen grains under a microscope makes an excellent companion study. For a broader introduction to insect microscopy at the beginner level, the Nikon MicroscopyU specimen preparation guide is a reliable free reference, and Carolina Biological’s insect specimen guide covers classroom-safe preparation techniques in detail.
Frequently Asked Questions
What should I do if wing scales keep falling off during slide preparation?
Some scale loss is normal — scales detach at the slightest touch — so the goal is to capture them, not stop the shedding. Instead of brushing or wiping, press a strip of clear tape firmly straight down onto the wing without sliding it sideways; the adhesive grabs a clean patch of scales and holds them in place. Keep dry mounts dry: any liquid mountant will both dislodge scales and dull their structural iridescence, so a tape-lift dry mount is the most reliable approach for beginners.
What are the most common beginner mistakes when mounting butterfly specimens?
The two biggest mistakes are wet-mounting wing scales (water and mounting medium fill the nanostructures and kill the iridescent blues and greens) and handling the scale surface directly with fingers or a brush, which smears the rows. Beginners also tend to start at high magnification with a delicate 3D specimen — always locate and center it at 10x first, then zoom in. Finally, breathing directly over an open wing fragment blows scales off, so work to the side of the specimen.
What does it cost to get started with butterfly microscopy?
It is one of the cheapest entry points in amateur microscopy. A usable entry-level stereo (dissecting) microscope runs roughly US$85–$160 — models like the Celestron Labs S20 (~$90) or an AmScope 20x–40x (~$155) are common starting points. Add about $10–$20 for glass slides, clear tape, and fine forceps, and a found or shed wing costs nothing — so a complete beginner kit is achievable for around $100.
How should I store butterfly specimens and slides between viewing sessions?
Keep specimens in a tightly closed box, away from direct sunlight (which fades color) and in low-humidity conditions (which prevents mold). For whole specimens stored long-term, add a fumigant such as mothballs, paradichlorobenzene crystals, or cedar to deter carpet beetles and booklice, and inspect the collection periodically for pest damage. Tape-lift slides can be kept flat in a standard slide box; they need no special chemicals.
Where can I legally source butterfly specimens for study in the US?
For minimal impact, use naturally deceased or found butterflies and shed wing fragments — even old, dried wings usually retain intact scales. To buy, reputable ethically-sourced suppliers include scientific outfits like Carolina Biological and Ward’s Science, plus specialist dealers such as BicBugs and The Butterfly Company. Avoid collecting wild specimens of uncertain status, since some species (notably the monarch, Danaus plexippus) are protected or of conservation concern.
Conclusion
Viewing a butterfly under a microscope is one of the most rewarding entry points into amateur microscopy — the specimens are beautiful, accessible, and rich with detail at every magnification level. Start with a tape-lift of wing scales under a stereo scope at 40x, then work through the proboscis, compound eye, and antennae at their respective magnifications. The structural vs pigment color distinction alone turns a casual observation into a genuine science lesson.
Have you tried this yourself? Whether you found a wing in your garden, ordered a pinned specimen, or lifted a few scales from a shed wing fragment, we’d love to hear what you saw — drop your experience or questions in the comments below.
Originally posted 2026-06-14 05:16:39.