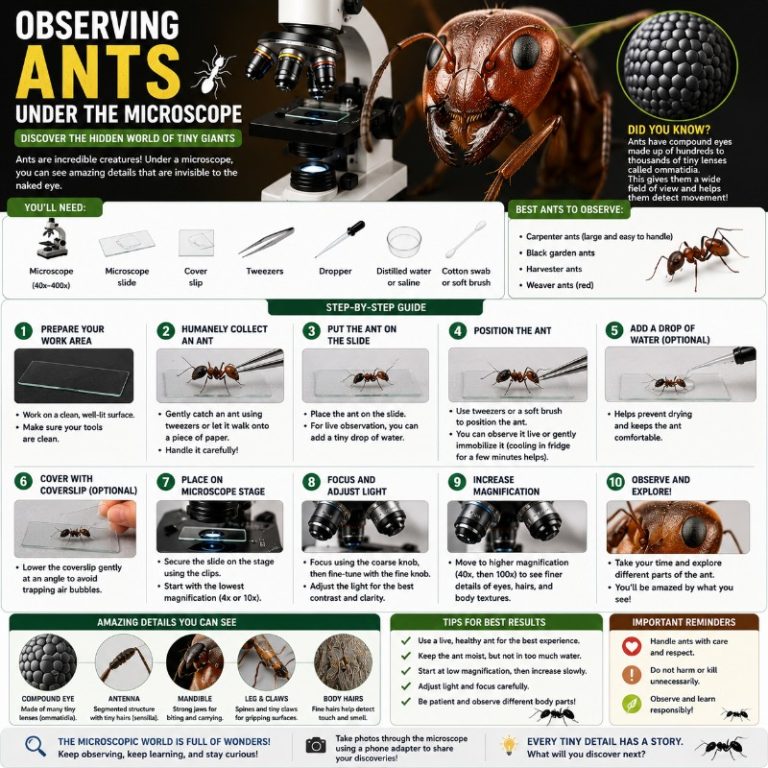
Ants reward every magnification step with something new — a whole body in motion at 10x, individual hairs and mandible teeth at 40x, and individual ommatidia in the compound eye at 400x on a prepared slide. Knowing what to expect at each level, and how to prepare your specimen correctly, is the difference between a blurry grey shape and a genuinely impressive image.
What Magnification Do You Need to See an Ant?
Total microscope magnification equals eyepiece power multiplied by objective power. A 10x eyepiece paired with a 4x objective gives 40x total; paired with a 40x objective, it gives 400x. Here is what each tier reveals:
| Magnification | Equipment | What becomes visible |
|---|---|---|
| 8–10x | Hand lens, handheld scope | Whole-body shape, three body segments, gross color, movement |
| 20–40x | Stereo / dissecting microscope | Individual hairs (setae), mandible teeth, antennal segments, petiole node, compound eyes |
| 100–400x | Compound microscope (prepared slide) | Individual ommatidia in the compound eye, cuticle surface texture, spiracles, fine structural detail |
For most hobby observations of ants above 2 mm, the 20x–40x range on a stereo microscope is the sweet spot — you work with an intact, unprepared specimen in 3D and see enough detail to identify species and watch behavior.
Choosing the Right Microscope
A dissecting microscope is the best starting point for ants. Its long working distance lets you handle the specimen beneath the lens, its stereoscopic image renders the raised surface structures that make ants visually compelling, and its 10x–40x range keeps the whole ant in frame. If you want to observe a live ant moving, grooming, or reacting to stimuli, a stereo microscope is the only practical option.
A compound microscope operates at higher magnification but requires a flat, translucent specimen on a glass slide. A whole ant on a compound scope produces a blurry silhouette — the body is too opaque and three-dimensional to focus at 100x or above. The compound scope is best reserved for prepared slides of isolated body parts: a leg, a wing, a section of compound eye. Beginners can purchase ready-made prepared ant slides, which are clean, coverslipped, and reusable indefinitely. Not sure which scope fits your setup? Our comparison of microscope types covers the full range.
How to Collect Ants for the Microscope
The most reliable collecting method is a pooter (aspirator) — a small jar with two tubes, one held near the ant and the other you suck gently. The ant is drawn in without direct handling, which keeps delicate setae intact. Alternatively, place a small card soaked in sugar water near an active ant trail; once several workers have climbed aboard, lift the card directly into a vial. For ground-nesting species, sifting leaf litter over a white sheet and quickly collecting what falls through is effective. Pitfall traps — small plastic cups flush with the soil surface, partially filled with 95% ethanol — work overnight for fast-moving ground species.
Whatever method you use, transfer ants promptly to your storage vials. Handling with bare fingers softens and stains the cuticle and degrades the specimen’s mounted appearance.

Ant Anatomy: What Each Part Looks Like Under the Scope
An ant’s body divides into three main regions: the head, the mesosoma (the thorax plus the first abdominal segment, which carries the legs and wings in winged forms), and the gaster (the rear, bulbous section). Connecting mesosoma to gaster is the petiole — the narrow “waist.” In some groups, a second waist segment called the postpetiole is also present. Node count (one waist segment vs. two) is one of the fastest identification characters in ant morphology you can read under a stereo scope.
At 20–40x, the mandibles — the hinged jaws projecting forward from the head — are immediately striking. The teeth (denticles) along their inner edges vary significantly between species: a carpenter ant carries large, powerful mandibles designed for cutting wood fibre; a red imported fire ant’s mandibles are shorter, with a distinctive four-tooth pattern. Preserved specimens with open mandibles let you count denticles directly — a quick identification cue.
The antennae are elbowed (geniculate) — a long straight basal segment followed by a sharp bend and a multi-segmented club. At 20x you can count individual antennal segments, which is itself a species character. Most ants have 10–12 segments.

Ants have two types of eyes. The large compound eyes, composed of many individual facets called ommatidia, are visible to the naked eye on most species. But they also carry three smaller ocelli — simple, single-lens eyes arranged in a triangle on top of the head capsule. Ocelli are most prominent in queens and male ants, and are effectively absent in many worker castes. Army ants (Eciton spp.) have no functional eyes at all — the head capsule is smooth where you would expect compound eyes. On a stereo scope at 40x you can usually make out each ocellus as a smooth, slightly raised dome. On a prepared compound-scope slide at 200–400x, the hexagonal ommatidia resolve into a honeycomb pattern that is genuinely arresting the first time you see it (Arizona State University).
Observing Live Ants at Low Magnification
Place a live ant in a sealed petri dish or small jar — a flat glass surface lets the stereo scope focus cleanly from underneath. At 10x, the first thing that surprises most beginners is the speed. Ants move fast even under a scope, and tracking one requires patience. Cold-slowing the ant helps: place the petri dish in a refrigerator for 3–5 minutes, or rest it briefly on an ice pack. The ant becomes sluggish but remains alive, and you can watch it groom its antennae with the strigil (a comb-like notch on the foreleg), observe the gaster contracting as it breathes through its spiracles, and see the antennae sweeping the environment in slow, deliberate arcs.
Argentine ants (Linepithema humile) are one of the easiest species to collect for first observations — they nest in large, shallow colonies in garden soil and wall cavities, and workers appear reliably wherever there is food. Native to South America, they are among the most widespread invasive ant species globally and are a declared pest in Western Australia, where control programs have been running for decades.
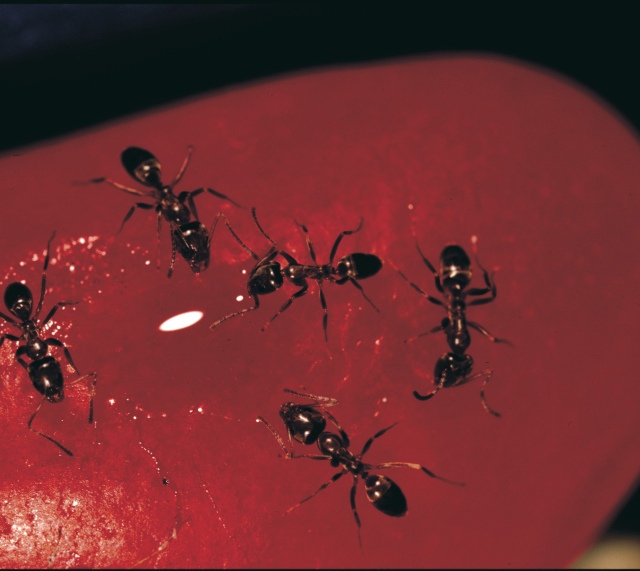
Argentine workers are strikingly uniform in size — one of the most obvious visual cues at low magnification. Under a stereo scope at 20x, their grayish-brown cuticle appears almost smooth compared to hairier species, and the single petiole node is clearly visible from above as a small bump between mesosoma and gaster. This uniformity across all workers in a colony is one reason Argentine ants can be identified confidently in the field even without a scope.
High-Magnification Observations and Prepared Slides
Once you move to a compound microscope and prepared slides, an ant stops being an insect and becomes an architecture problem. The face of a red imported fire ant (Solenopsis invicta) at 100x is one of the more dramatic subjects in amateur entomology: the compound eyes flank the head like dark, faceted shields, the scape (first antennal segment) rises from between them, and the mandibles dominate the lower half — short, powerful, with a serrated four-tooth edge. The image from Clemson University below shows exactly this view, with the mandibular area and antennal insertions resolved in clear detail.

For a sense of the resolution only available with scanning electron microscopy, see our electron microscope images of insects — the cuticle texture and spiracle detail visible at that scale are simply not achievable with light microscopy.
Purchasing pre-prepared ant slides removes the specimen-preparation step entirely. Ready-made slides of ant legs, wings, and mouthparts are widely available and can be returned to repeatedly. If you want to prepare your own specimen slides, isolated body parts can be mounted in glycerine jelly, but point mounting (described below) is generally a better approach — it preserves the whole ant in 3D and produces a reference specimen rather than a one-time slide.
Species Comparison: Argentine Ant vs Red Imported Fire Ant Under Magnification
| Feature | Argentine ant (Linepithema humile) | Red imported fire ant (Solenopsis invicta) |
|---|---|---|
| Worker size | Uniform ~2.6 mm — all workers identical | Polymorphic — minor to major workers range 2–6 mm |
| Color | Grayish to dark brown | Reddish-brown head and thorax, darker gaster |
| Surface hairs | Almost smooth — very few setae | Moderately hairy, especially on gaster |
| Mandible teeth | 4–5 denticles, roughly equal in size | 4 denticles, clearly variable in size |
| Petiole nodes | One node (petiole only) | Two nodes (petiole + postpetiole) |
| Status | Declared pest in WA; invasive globally | Invasive US South; notifiable biosecurity pest in AU |
Preparing Your Own Ant Specimens
Collecting and Preserving
Preservation quality determines how useful a specimen is under the scope. The recommended preservative for ants is 95% ethanol — not the 70–75% rubbing alcohol sold at pharmacies. Lower concentrations kill the ant slowly and allow bodily fluids to dilute the solution, producing discolored, bloated specimens that mount poorly. A 95% concentration kills quickly, minimizes color change, and is preferred whether you are mounting for morphology or saving tissue for future molecular work, per USDA-ARS entomology guidance.
- Place collected ants immediately into a labeled vial of 95% ethanol.
- After 24 hours, transfer the ants to a fresh vial of 95% ethanol — body fluids dilute the first batch significantly, accelerating specimen degradation.
- Store vials in a cool, dark place (a refrigerator is ideal) to preserve color and structural integrity.
- Label each vial at collection: site, date, collector name, and habitat notes. This information cannot be reconstructed after the fact and is essential for any reference or scientific use.
Collect multiple individuals where possible and aim for different castes — the difference in ocelli prominence and overall size between a queen and a worker from the same colony is striking side by side.
Point Mounting
Point mounting keeps the ant intact and three-dimensional, which is far preferable to flattening it on a slide. A point is a small triangular card punched from archival paper with a hole for an insect pin. Properly mounted, the ant is held at the card tip and can be rotated to any angle under the scope (AntWiki).
Materials: #3 insect pins, laser-cut card points, clear water-soluble glue, vials, filter paper, a watch glass, and fine forceps.
Procedure:
- Transfer the preserved ant from its vial onto a watch glass containing fresh ethanol. Allow several minutes for the specimen to relax — a stiff, curled ant is much harder to mount cleanly.
- Using forceps, carefully straighten the legs so they do not obscure the gaster or petiole. This is the step that takes the most practice; rushing it snaps legs.
- Apply a tiny dot of water-soluble glue to the tip of a card point — less than you think you need.
- Contact the glue dot to the basal segment of the ant’s middle leg, positioning the ant horizontally and upright, with the point extending from the right side of the body. The ant should be roughly parallel to the ground, not tilted.
- Allow the glue to dry completely before moving the specimen under the scope. Glue that is still wet migrates onto hairs and gaster, obscuring the features you are trying to see.
- Ants are commonly mounted in small groups — often three per set — to allow comparison of workers from the same colony simultaneously.
- Label below the ant with collection data; add a second label below that with collector information. Standard entomological practice uses archival-quality paper printed or written in permanent ink.

The Doryline ant above has been relaxed, stretched, and mounted on a point before bright-field illumination. Individual setae are visible along the full body length — evidence that the specimen was not over-glued and the hairs were not crushed during mounting. This is what a well-executed point mount looks like at low compound magnification.
Common Beginner Mistakes
Too much glue is the single most common failure. A dot the size of a pinhead is sufficient. Excess glue flows outward as it dries and covers setae, mandible denticles, and tarsi — exactly the features the mount was supposed to preserve. Water-soluble glue can sometimes be removed by wetting, but cuticle hairs rarely survive intact once glued down.
Pinning directly through the body destroys the gaster and petiole. The insect pin goes through the card point, not the ant. This is the most often missed step for beginners working from general insect-pinning guides rather than ant-specific instructions.
Specimen drying before mounting. An ant pulled from ethanol and left to air-dry for more than a minute or two curls into a contracted, legs-folded position that is almost impossible to correct without breakage. Work in a watch glass of ethanol and mount directly while the specimen is still moist.
Diluted preservation alcohol. When the ethanol in your collection vial turns noticeably yellowish, the ants have saturated it with bodily fluids — the effective concentration has dropped and the specimens will begin to degrade. Change the alcohol, and do it within 24 hours of collection as a standard habit.
Specimen selection. Where possible, select ants with mandibles naturally open — this gives a clear view of the denticles. An ant with mandibles clamped shut still shows the mandible shape but obscures the tooth pattern that is most useful for species comparison.
Frequently Asked Questions
Can ants be seen under a regular microscope?
Yes. A stereo or dissecting microscope is the most practical choice — it works with a whole, live or preserved ant in 3D at 10–40x and requires no specimen preparation. A standard compound microscope can be used at higher magnification, but requires the specimen to be prepared on a flat, translucent slide; a whole ant placed directly under a compound scope at 100x produces an unfocusable silhouette.
Do ants have eyes you can see under a microscope?
Ants have two types of eyes. The large compound eyes — composed of individual facets called ommatidia — are visible to the naked eye on larger species and resolve into a honeycomb structure under a compound scope. The three ocelli (simple eyes on top of the head, arranged in a triangle) only appear clearly under magnification, and are most prominent in queens and male ants. Army ants have no functional eyes at all — the head capsule is smooth where compound eyes would otherwise be.
What is the difference between a fire ant and an Argentine ant under magnification?
The easiest visual cues at 20x: Argentine ant workers are all the same small size (~2.6 mm) with a smooth, grayish-brown surface and a single petiole node. Red imported fire ant workers vary markedly in size within the same colony (minor workers to large majors), are reddish-brown, and have two petiole nodes — the postpetiole is clearly visible as a second bulge ahead of the gaster. The size polymorphism alone is usually enough to separate them at a glance.
For more microscopy subjects, see our guide to observing sand under a microscope — the mineral variety in a single pinch is genuinely surprising at low magnification.
Conclusion
Ants are one of the most structurally rich and accessible insects to observe under a microscope. A basic stereo scope at 20–40x reveals the petiole node count, mandible denticles, antennal segments, and compound eyes that let you distinguish species on sight — no prepared slides required. For longer-term reference specimens, 95% ethanol preservation followed by careful point mounting produces results that last indefinitely and reward re-examination at higher magnification. Start with a live Argentine ant in a chilled petri dish, note what becomes visible at each power step, then work up to a preserved fire ant to compare mandible geometry and petiole structure directly — the anatomical differences between the two species become immediately readable once you know what each feature looks like.
Originally posted 2020-05-21 13:50:57.