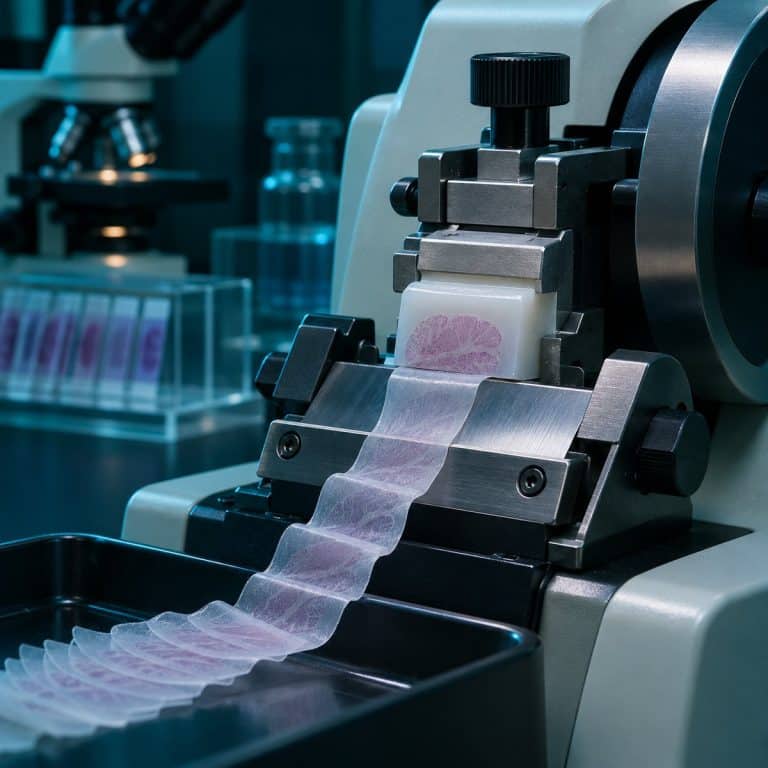
How a microtome works comes down to one idea. A fixed, razor-sharp blade stays put while a precision screw pushes the specimen block forward by an exact distance after every pass. For routine paraffin tissue that distance is about 4 micrometers (µm), roughly one-seventeenth the thickness of a human hair. The same fixed-blade, advancing-specimen design handles everything from wax-embedded tissue to resin blocks for electron microscopy. It is why a prepared slide stays crisp at 400×.
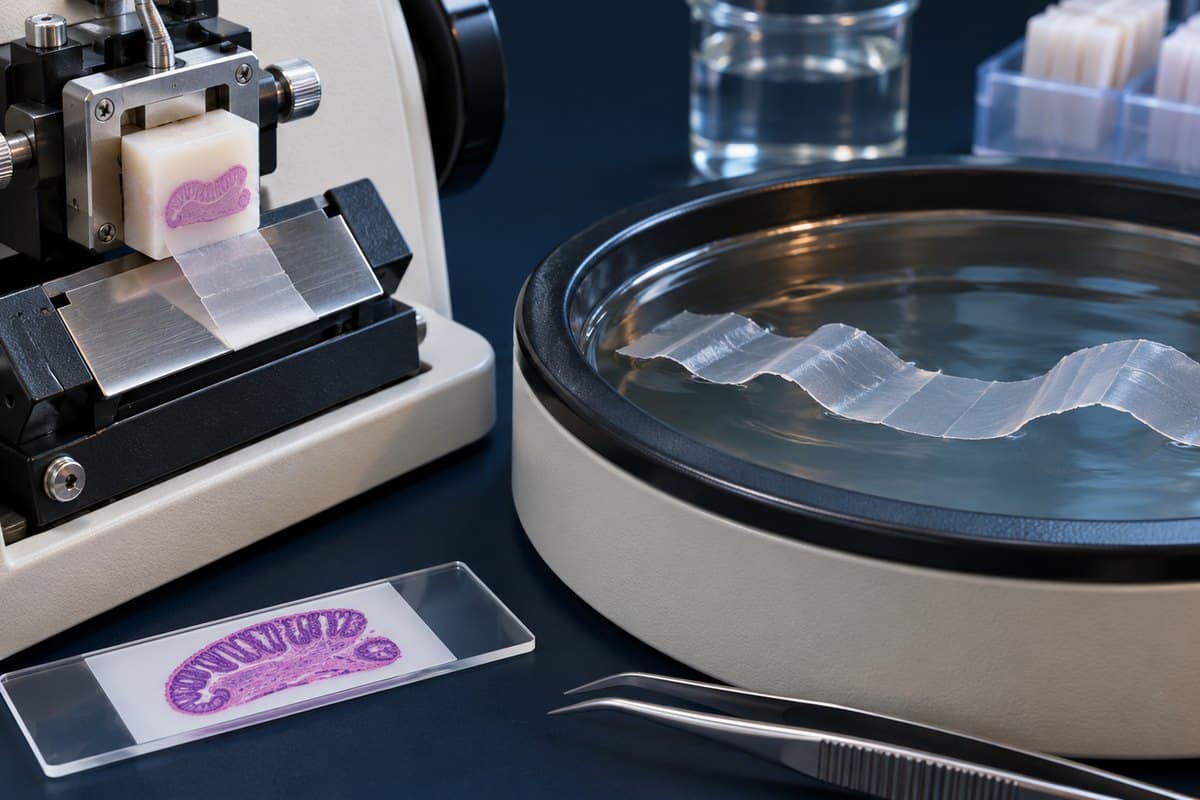
The Cutting Cycle, Step by Step
A mechanical microtome repeats the same short cycle for every section, and the machine’s real job is making each repeat identical. The specimen sits in a specimen clamp (chuck). The blade sits in a knife holder tilted to a clearance angle of roughly 3–8°, so only the cutting edge touches the block face. A thickness selector sets how far the feed mechanism, a micrometer screw, advances the block each time. See Thermo Fisher’s tissue-sectioning overview for additional context.
- Clamp. Lock the block in the chuck and the blade in its holder, and set the clearance angle.
- Advance. The micrometer screw moves the block toward the blade by the dialed-in thickness, for example 4 µm.
- Cut. Turning the handwheel carries the block past the stationary blade, and one section peels off.
- Retract. Many rotary models pull the block back slightly on the return stroke so its face never rubs the blade.
- Repeat. The next advance and cut shave off another section of identical thickness.
On a rotary microtome you can feel the rhythm: each turn gives a soft “shhk” as the block crosses the edge. A thin, almost transparent wax film slides off the blade. Because the cut slightly warms the wax at the blade, the leading edge of each paraffin section fuses to the trailing edge of the one before. The sections therefore build into a ribbon, a strip of tiny connected windowpanes, each one the outline of the block with a faint ghost of tissue inside.
The blade does the cutting, and the microtome only supplies repeatable, micron-precise advance. That precision is what separates it from a hand razor. A microtome also does not magnify anything; it only prepares specimens so a microscope can see through them. One safety habit applies to every model: lock the handwheel and cover the blade whenever you are not cutting, and never try to catch a falling blade.
The 5 Main Types of Microtome
Microtomes differ in how the blade and block move and in what state the specimen must be in before cutting. The Britannica entry on the microtome gives the general definition. See Thermo Fisher’s rotary-microtome manual for additional context.
Rotary Microtome
A rotary microtome moves the specimen block up and down past a stationary blade as you turn a handwheel, and motorized versions do the same. It is the workhorse of routine histology, producing paraffin sections 3–5 µm thick, with 4 µm as the standard target for pathology slides. Technicians first “face” the block at a thicker setting, around 10–30 µm, to expose the full tissue surface, then drop to the working thickness.
Sliding and Sledge Microtomes
A sliding microtome moves the knife horizontally across a stationary block. A sledge microtome puts the block on a heavy sled that travels under a fixed knife. Both handle large or hard specimens that would stress a rotary machine: whole-brain sections, wood, celloidin-embedded tissue, and bone, which is usually decalcified first. Thickness runs from about 1 to 60 µm, and wood and plant work often sits at 10–30 µm. If you want to see what a well-cut hard-tissue section reveals, look at the osteons in compact bone tissue under a microscope.

Cryostat
A cryostat is a rotary microtome housed inside a refrigerated chamber, typically around −20 °C (−4 °F), so a cryostat contains a microtome rather than replacing one. Tissue is frozen quickly in a water-soluble embedding medium called OCT compound, which skips paraffin processing entirely. Sections are usually 5–10 µm, up to 30–50 µm for neuroscience work, and an anti-roll plate keeps them from curling like tiny wood shavings. Hospitals use cryostats for intraoperative frozen sections, where a pathologist examines tissue during surgery, often within 10–20 minutes. Freezing also preserves antigens and lipids that paraffin processing can damage or dissolve. The trade-off is that ice crystals make the structure look rougher than a paraffin section.
Vibratome
A vibratome cuts with a blade that vibrates side to side at high frequency while it slowly advances through fresh or lightly fixed tissue that has not been frozen. The tissue is usually supported in agarose and submerged in buffer. Sections are deliberately thick, commonly 20–1,000 µm and typically 50–400 µm, and because there is no freezing or wax, cells can stay alive. That makes vibratomes the tool for live brain slices, organotypic cultures, and thick sections for confocal imaging.
Ultramicrotome
An ultramicrotome cuts resin-embedded specimens with a glass or diamond knife, and the sections float onto a water-filled trough right behind the knife edge. Ultrathin sections of about 50–100 nm (commonly 60–90 nm) are what a transmission electron microscope needs, because electrons only pass through extremely thin material. You judge thickness by interference color on the water: gray is under 60 nm, silver is about 60–90 nm, gold is about 90–150 nm, and purple means too thick. The same machine cuts “semithin” sections of 0.5–1 µm for light microscopy, usually stained with toluidine blue. To see why the electron beam sets that requirement, read how TEM differs from SEM; scanning instruments image surfaces and generally do not need ultrathin sections.

| Type | How it cuts | Specimen prep | Typical thickness | Main use |
|---|---|---|---|---|
| Rotary | Block moves up and down past a fixed blade | Fixed, paraffin-embedded | 3–5 µm (4 µm standard) | Routine histology and pathology |
| Sliding / sledge | Knife slides across a fixed block, or a sled carries the block under a fixed knife | Large or hard blocks, wood, celloidin | ~1–60 µm | Whole-brain sections, wood, bone |
| Cryostat | Rotary microtome inside a roughly −20 °C chamber | Frozen in OCT compound | 5–10 µm (up to ~50 µm) | Intraoperative frozen sections, immunofluorescence |
| Vibratome | Vibrating blade advances slowly through tissue | Fresh or fixed, in agarose, in buffer | 20–1,000 µm (usually 50–400 µm) | Live tissue slices, thick confocal sections |
| Ultramicrotome | Glass or diamond knife, sections float on water | Resin-embedded | 50–100 nm ultrathin; 0.5–1 µm semithin | TEM, semithin survey sections |
From Wax Block to Stained Slide
Paraffin sectioning is the most common microtome workflow, and the cutting step is only one stage of it. A block has to be fixed, processed, embedded, and trimmed before the blade ever touches it.
- Fixation: usually 10% neutral buffered formalin.
- Processing: dehydrate through graded alcohols, clear with xylene or a substitute, then infiltrate with molten paraffin wax, which melts at about 56–58 °C.
- Embedding: set the tissue in a wax block on a cassette.
- Facing: trim the block on the microtome. Chilling it on ice or a cold plate makes cutting cleaner.
- Sectioning: cut at 3–5 µm to produce a ribbon.
- Floating: lay the ribbon on a warm water bath, about 40–45 °C, to flatten wrinkles.
- Pick-up and drying: lift the section onto a glass slide, then bake it, roughly 37 °C overnight or about 60 °C for a shorter time.
- Staining: remove the wax, stain (H&E is the standard), and add a coverslip.
The water bath is the most satisfying step to watch. A creased ribbon relaxes and flattens within seconds, and the wrinkles seem to melt out. Leave it too long, or use water that is too hot, and the wax spreads and the tissue tears apart. An unstained section on the slide is nearly invisible, just a faint cloudy outline, and only turns pink and purple once stained. For the general mounting skills behind the last steps, see this step-by-step guide to preparing microscope slides.
Why Thinner Sections Show More
Section thickness controls how much of a specimen you can actually see in focus. A brightfield microscope works by transmitted light, so the specimen has to be thin enough for light to pass through, but the bigger limit is focus. Depth of field shrinks as magnification rises. It is only about 1 µm at 40× (NA around 0.65) and well under 1 µm with a 100× oil lens, as Nikon’s MicroscopyU explains. Anything thicker than that is out of focus and blurs across the sharp layer.
Typical animal cells are 10–20 µm across and nuclei are about 5–10 µm. A 4 µm section is therefore thinner than most single cells, so cells rarely stack on top of each other and you see crisp individual cells and nuclei instead of overlapping layers. Thick sections also take up stain unevenly and look dark and muddy. For scale, a human hair averages about 70 µm (50–100 µm). A 4 µm paraffin section is about 1/15 to 1/20 of a hair, and a 70 nm TEM section is about 1/1,000 of one.
Thinner is not always better, though. Vibratome slices are thick on purpose to keep cells alive or preserve 3D structure, and frozen sections give up some detail for speed. Well-cut sections are what make tissue reading possible, whether you are studying striations in muscle tissue under a microscope or the layers of skin cells under a microscope. Electron work demands far thinner slices still; see light vs electron microscopes.
Common Sectioning Problems (and What Causes Them)
Sectioning artifacts are the fastest way to learn what a microtome is doing, because each one points to a specific mechanical cause. The most common beginner mistake is cutting a warm block, which makes sections compress, wrinkle, and smear. The fix is to chill the block face-down on ice or a cold plate for a few minutes. The second is turning the handwheel unevenly or too fast, which produces thick-and-thin sections. A smooth, steady, moderate rhythm fixes it.
| Problem | What it looks like | Cause | Fix |
|---|---|---|---|
| Chatter | Alternating thick and thin bands parallel to the blade edge | Loose blade or block, wrong clearance angle, tissue too hard | Tighten clamps, reset the angle |
| Knife lines | Streaks across every section, perpendicular to the edge | Nick in the blade | Slide the blade sideways to a fresh area |
| Compression, wrinkles, folds | Crushed, creased sections | Dull blade or warm block | Fresh blade, chill the block, float on the water bath |
| Ribbon will not form | Sections curl or separate | Block too cold or wax too hard | Lightly breathe on the block face |
Hand Sectioning at Home: A Microtome Alternative
Hand sectioning with a razor blade gives hobbyists usable plant sections without a microtome, though only at about 20–100 µm. Celery stalk, sunflower or Tradescantia stems, and soft leaves section easily; woody stems are hard. Formalin and xylene are not needed for this method.
- Support the specimen. Hold a celery piece or stem steady. For a soft leaf, sandwich it between two halves of a carrot or potato chunk (or a slit cork or foam block) and slice through both.
- Wet a fresh blade. Use a new double-edge razor blade rather than a craft knife. For control, carefully snap it in half and wrap the unused edge in tape.
- Use one drawing stroke. Pull the blade across the specimen in one long, smooth slicing motion. Pressing straight down crushes the tissue.
- Cut many slices. Make 10–20 and drop each into water immediately, because sections dry out and curl.
- Select the thinnest. Look for the most translucent ones. A thin wedge at the edge of a slice is often the most useful part.
- Stain. Iodine, toluidine blue, or safranin all work on plant tissue.
- Mount. Make a wet mount with a coverslip, following this guide to making a wet mount slide.
Expect a hand section at 30–80 µm to show cell walls and tissue layers well at 40–100×, then turn into a blurry stack at 400×. That is the thickness-versus-depth-of-field lesson from above, observed directly. A hand microtome, a barrel with a micrometer screw and a top plate you slide the razor across, improves consistency. You are still cutting by hand, so expect about 15–30 µm at best. Razor blades are extremely sharp: cut away from your fingers and use a brush or forceps to move sections.
Frequently Asked Questions
What is a microtome blade made of?
Most routine labs use disposable steel blades, low-profile for soft tissue and high-profile for harder tissue. Tungsten carbide knives handle hard materials, while ultramicrotomes use glass or diamond knives, and diamond lasts much longer.
Who invented the microtome?
Credit is shared and varies by source. Wilhelm His Sr. is often credited with an early precision microtome in the 1860s, and Charles Sedgwick Minot is usually credited with the rotary design in the 1880s. The Wikipedia history of the microtome covers the earlier designs in more detail.
Is a microtome the same as a microscope?
No. A microtome prepares a specimen by cutting it into thin sections, while a microscope magnifies it. They work as a pair, since the microscope can only show you what the microtome has made thin enough to see.
Why throw away the first few sections?
After you drop from the thick facing setting to 4 µm, the first few sections are often uneven. Discard them and keep the ones that follow.
Why do ribbons fly up and stick to my hand in winter?
Static. Dry winter lab air makes the thin ribbon cling to the blade or your hand. An anti-static aid helps, as does a light breath on the block face.
Do I need formalin or xylene to section plants at home?
No. Both are hazardous lab chemicals, and fresh plant material cut with a wet razor needs neither. Keep them out of a hobby setup.
Conclusion
A microtome holds a blade still and advances the specimen by a precise, repeatable amount, turning a solid block into sections thin enough to focus on cleanly. Rotary machines make 4 µm paraffin slices, cryostats trade detail for speed, vibratomes keep tissue alive, and ultramicrotomes cut around 70 nm for electron microscopy.
Have you tried hand sectioning a stem or leaf yourself? Tell us what you cut, how thin you got it, and what you saw at 400× in the comments below.