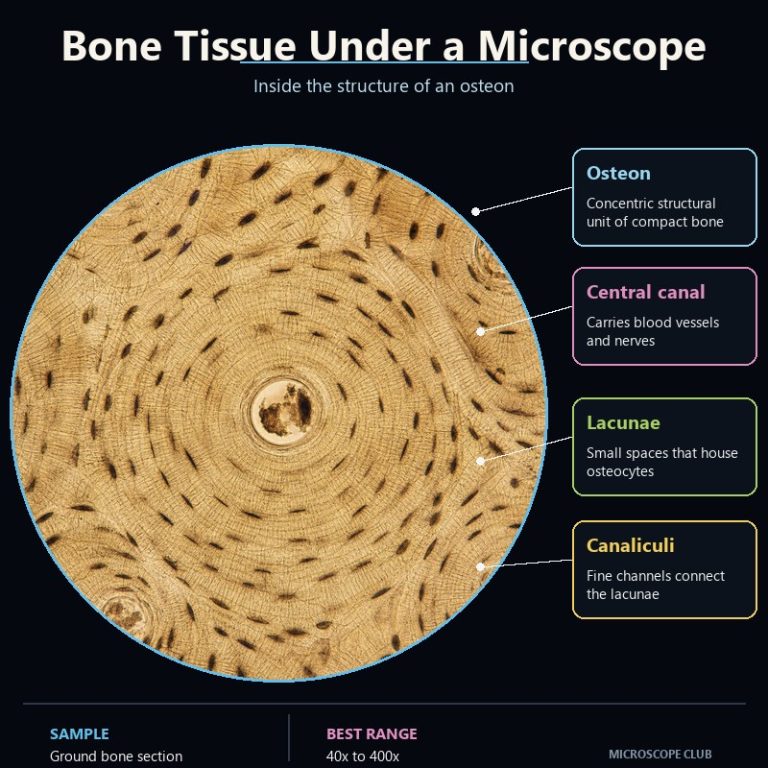
Bone tissue under a microscope shows a striking bullseye pattern: repeating cylindrical units called osteons, each built from concentric rings of mineralized matrix wrapped around a central canal, dotted with tiny cell chambers and hair-thin connecting channels. What you’re actually viewing is never raw bone — it’s a prepared, decalcified or ground thin section, because bone in its natural state is too dense and opaque for light to pass through. Once you can spot one clean osteon, the rest of the slide reads like tree rings stamped across the field.
Why You Can’t Just View Raw Bone
Bone (osseous tissue) is a specialized connective tissue: living cells embedded in a hard, mineralized matrix that’s roughly 65% inorganic hydroxyapatite (calcium phosphate crystals) and 35% organic material, mostly type I collagen. The mineral component is what gives bone its compressive strength and is also exactly why you cannot slice a raw chip of it and expect a microtome — or light — to cooperate, as the SEER Training skeletal system modules lay out in detail.
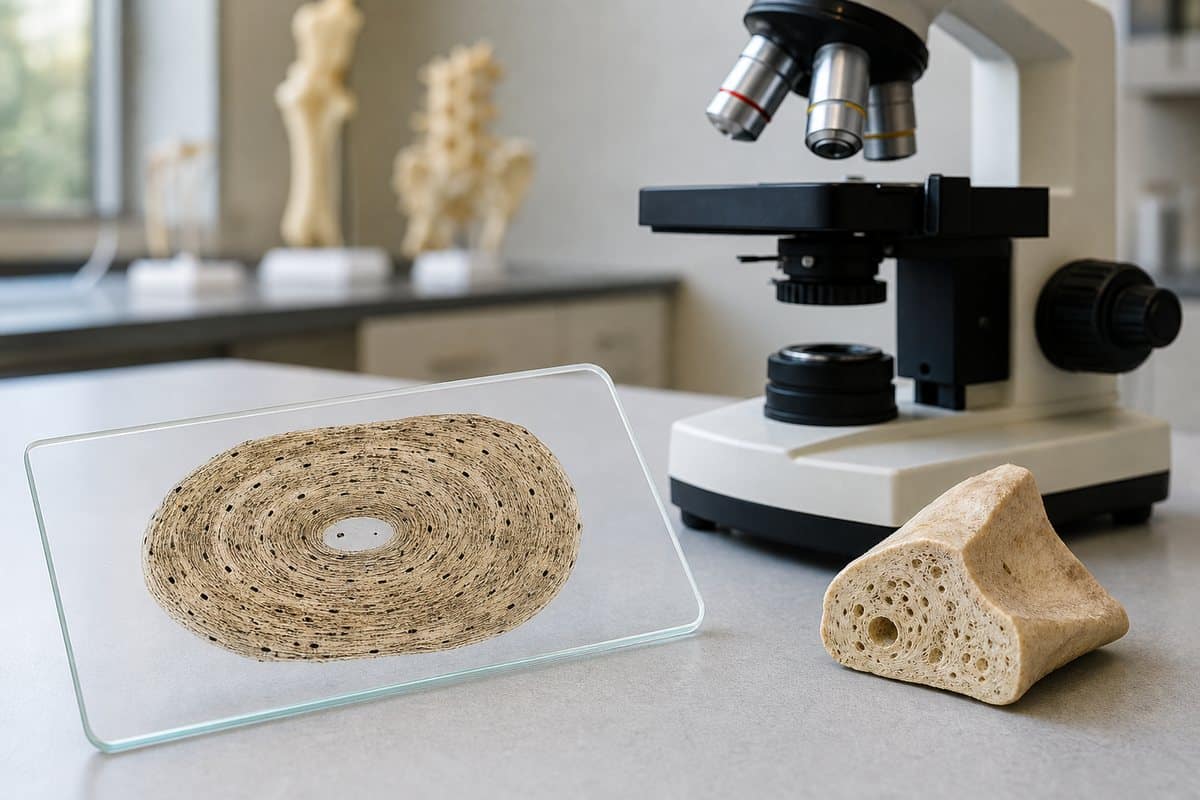
Lab technicians get around this two ways. A decalcified section soaks the bone in acid or EDTA until the mineral dissolves, leaving the soft collagen-and-cell matrix behind to be embedded, thin-sectioned, and stained — usually with H&E. This preserves the osteocytes, but the tissue is no longer rigid. A ground section takes the opposite approach: dry bone is ground and polished into a translucent wafer without removing any mineral. The cells are long gone, but the mineralized architecture — lacunae, canaliculi, the whole Haversian layout — survives beautifully. Ground sections are the classic teaching slide for osteons, and they’re what most of the images in this article describe.
Either way, this is lab work, not a kitchen-table project — don’t try to decalcify a bone fragment at home with acid. Nearly everyone encountering this topic is working from a prepared slide bought ready-made, not a wet mount slide you assemble yourself. Bone simply isn’t a wet-mount specimen.
What You See First — The Osteon (Haversian System)
The osteon, or Haversian system, is the structural building block of compact bone, running roughly parallel to the bone’s long axis — and it’s the first thing you’ll spot. Drop a ground compact-bone slide onto your compound microscope stage and scan at low power: the field looks like a scatter of tiny bullseyes, or cut tree stumps — a dark center hole ringed by pale concentric bands. Some are complete circles; plenty are squashed into ovals depending on the angle the section caught them at.
Central (Haversian) Canal
The central canal is the clean, round-to-oval empty hole sitting in the middle of every osteon. In life, it carries the blood vessels and nerves that keep the surrounding bone alive — on a dry ground slide, it just reads as open space.
Concentric Lamellae
Concentric lamellae are the rings themselves: layers of mineralized matrix stacked around the central canal like tree rings. The collagen fibers inside each layer run in a different direction from the layer next to it, a plywood-style arrangement that lets the osteon resist stress from multiple angles at once — a structural detail the Kenhub histology atlas covers well if you want the layer-by-layer breakdown.

Lacunae (and the Osteocytes Inside)
Lacunae are the small almond- or lens-shaped spaces sitting between the lamellae, arranged in rings that follow the concentric bands. On a ground slide they show up as rows of tiny dark specks — coffee grounds arranged in circles — because each lacuna once housed an osteocyte, a mature bone cell, and now just holds trapped air and debris that blocks light. On a decalcified, H&E-stained slide, you’d instead see a small purple dot inside each lacuna: the actual osteocyte nucleus.
Canaliculi
Crank up to the 40x objective and each dark lacuna sprouts fine hairs radiating in every direction — those are the canaliculi, hair-thin channels that connect neighboring lacunae to each other and back to the central canal. They look like iron filings clustered around a magnet, or cracks spidering out from a chip in glass. Canaliculi carry the cytoplasmic processes osteocytes use to pass nutrients and waste between each other — proof that bone, despite looking like inert mineral, is living tissue with an active cellular network running through it.
Structure-at-a-Glance Table
Keep this open next to the eyepiece while you scan your slide — it maps each structure to what it actually looks like and the magnification where it first becomes clear.

| Structure | What It Is | What It Looks Like | Magnification to See It |
|---|---|---|---|
| Osteon (Haversian system) | Structural unit of compact bone | Bullseye / tree-ring cylinder | 40x (whole pattern) |
| Central (Haversian) canal | Longitudinal channel for vessels/nerves | Round-to-oval empty hole | 100x |
| Concentric lamellae | Rings of mineralized matrix | Pale bands around the canal | 100x |
| Lacunae | Spaces that housed osteocytes | Dark almond-shaped specks in rings | 100x–400x |
| Canaliculi | Channels linking lacunae | Fine dark hairs off each lacuna | 400x |
| Volkmann’s canals | Perpendicular connecting channels | Canals cutting across rings, no lamellae of their own | 100x |
What You See at Each Magnification
Reading a compact-bone slide is a climb, not a jump — start low and work up, or you’ll get lost in a field of near-identical rings.
At scanning power (40x total, the 4x objective), you get orientation: multiple osteons scattered across the field as bullseye shapes, plus the general dense texture of the section. This is where you pick a landmark — one clean, complete osteon to return to as you climb.
At 100x total (the 10x objective), individual osteons resolve clearly: the central canal, the concentric lamellae, and the ring of lacunae all become distinct. This is the sweet-spot magnification for identifying an osteon and is worth understanding through total magnification — eyepiece power times objective power, so a 10x eyepiece and 10x objective give you that 100x.
At 400x total (the 40x objective), individual lacunae shape sharpens and the canaliculi finally appear, radiating out in fine dark lines. On a decalcified, stained slide you’ll also pick up osteocyte detail inside the lacunae at this power. Going beyond 400x rarely helps on a routine teaching slide — 1000x oil immersion is more resolving power than a bone cross-section needs.
Two practical fixes solve most of the frustration here. First, close down the condenser iris noticeably — bone is one of the few slides where less light reveals more, since the low-contrast lacunae and canaliculi wash out under too much brightness. Second, if the section looks muddy or brown rather than crisp, the wafer is simply too thick; a thinner ground section gives sharper rings. If you’re chasing canaliculi at 100x and can’t find them, that’s not a focus problem — it’s a job for the 4x, 10x, and 40x objective lenses working together with contrast, since magnification and resolution are two different things and canaliculi need both.
Haversian vs. Volkmann’s Canals (and Other Lamellae)
Volkmann’s (perforating) canals are the classic mix-up for beginners. A Haversian canal sits dead-center in a ring of concentric lamellae; a Volkmann’s canal runs perpendicular to it, cutting across the rings to link neighboring Haversian canals and connect the bone’s interior to its outer surface — and it has no concentric lamellae of its own. If a canal looks like it’s slicing through someone else’s tree rings rather than sitting at the center of its own, you’re looking at a Volkmann’s canal.
Between the neat, complete osteons you’ll also spot messy angular fragments with only partial rings — these are interstitial lamellae, leftover pieces of older osteons that bone remodeling has partially resorbed and replaced. Circumferential lamellae are the more orderly cousin: rings that run around the entire outer or inner circumference of the whole bone shaft, just under the periosteum on the outside or the endosteum on the inside.
Is Bone Really Alive? What the Lacunae Tell You
Osteocytes are the mature bone cells that live inside the lacunae, and they’re the reason bone counts as living tissue rather than inert mineral scaffolding, as the NCBI Bookshelf’s Histology, Bone overview confirms. Each osteocyte maintains the matrix immediately around it, and the canaliculi network is how it stays fed — cytoplasmic processes reach out through those hair-thin channels to exchange nutrients and waste with neighboring cells and with the blood supply running through the central canal. Cut that network off and the surrounding bone dies, which is exactly what happens in some fracture and disease processes. It’s also worth remembering that bone marrow, tucked inside the same skeleton, is where the body manufactures its blood cells — a very different cell population from the osteocytes sitting quietly in their lacunae.
Compact vs. Spongy Bone Under the Microscope
Compact (cortical) bone is everything described above — the dense outer shell, and the slide type you’ll see by far most often. Spongy (cancellous) bone, the porous interior found in places like vertebrae and the ends of long bones, looks completely different under the scope. Instead of tidy concentric osteons, it shows an open lattice of trabeculae — thin mineralized struts with marrow-filled spaces between them and no organized Haversian system running through them. If your slide shows repeating bullseyes, you’re looking at compact bone; if it shows a loose, sponge-like meshwork, you’re looking at spongy bone.
Frequently Asked Questions
What’s the difference between osteocytes, osteoblasts, and osteoclasts?
Osteocytes are the mature cells sitting in the lacunae you see on a bone slide. Osteoblasts are the cells that build new matrix in the first place, and osteoclasts are large cells that break existing bone down during remodeling. Of the three, only osteocytes are typically visible on a routine compact-bone cross-section.
Why do the lacunae look dark on a ground bone slide instead of showing cells?
On a ground section, the actual cells are gone — the bone was never chemically treated to preserve them, just ground into a thin, undecalcified wafer. The dark color comes from trapped air and debris inside the empty lacunae and canaliculi blocking light, not from stained cell material.
What stain is used for bone histology?
Decalcified bone sections are typically stained with hematoxylin and eosin (H&E), the standard stain that colors nuclei purple and other tissue components shades of pink. Ground sections aren’t stained at all — their contrast comes from trapped air and light scattering, not dye.
Can I use a smartphone microscope to see bone osteons?
Not usefully. Resolving the ring structure of an osteon, let alone individual lacunae or canaliculi, needs the optical quality and magnification range of a real compound microscope with at least a 10x and ideally a 40x objective. Clip-on phone lenses don’t have the resolving power for this level of detail.
Do I need a 100x oil immersion objective for a bone slide?
No. Everything described in this article — the osteon layout, lacunae, and canaliculi — resolves clearly by 400x (the 40x objective). Oil immersion is more power than a routine compact-bone teaching slide requires.
Why does my ground bone section look brown and blurry instead of crisp?
The wafer is too thick. Ground sections need to be polished down to a genuinely thin, translucent slice — a thick section scatters too much light and muddies the rings and lacunae you’re trying to resolve.
Conclusion
Once you know you’re looking at a prepared section rather than raw bone, the rest of the slide falls into place fast. Find one clean osteon at low power, then climb through 100x and 400x to pick out the central canal, the concentric lamellae, the ring of lacunae, and the fine canaliculi threading between them. The same handful of structures repeats across the whole field, so the first osteon you identify confidently is really the key to reading the entire slide.
Have you spotted a Volkmann’s canal cutting across your osteons, or found a beautifully complete bullseye on your own slide? Share what you found — and what magnification it took to see it — in the comments below.
Originally posted 2026-08-03 12:00:00.