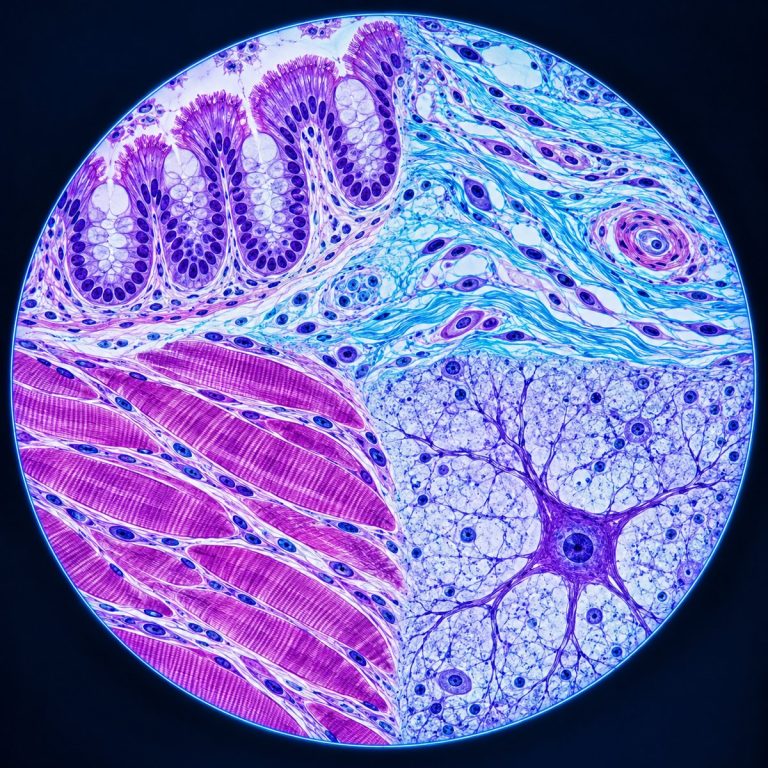
A histology slide is a slice of tissue about 4 to 5 micrometers thick, chemically preserved and embedded in wax. It’s cut on a microtome, stained with two dyes, and sealed under a coverslip. You read one by starting at the lowest magnification to find its overall architecture, then climbing one power at a time until you reach individual cells.
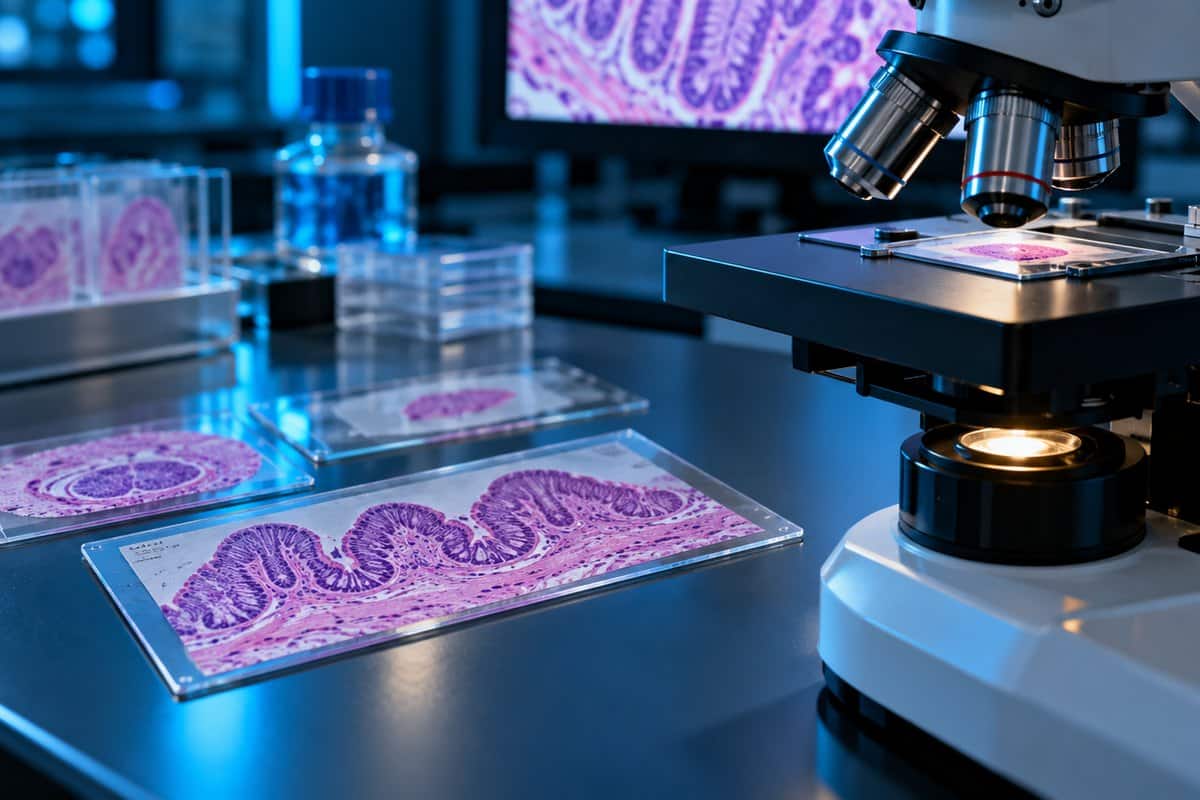
The 5-Step Magnification Ladder
Work from low power to high every time. Skipping straight to high magnification is the single most common beginner mistake, because a tissue makes no sense until you’ve seen its overall pattern. See OpenStax’s four-tissue overview for additional context.
- Naked eye — find the tissue. Look at the slide against a light background. Most prepared sections show up as a pale tan or lilac smudge the size of a grain of rice, off-center under the coverslip. Note whether it’s a tube or a solid piece.
- 4x objective (40x total) — read the architecture. Ask one question: is this a hollow tube, a solid organ, or a layered sheet? At this power the tissue reads as a shape, not as cells.
- 10x objective (100x total) — map the regions. Distinct zones separate — an epithelial lining from the tissue beneath it, or one organ layer from the next. Pick your close-up spot near the middle, not the edge, since edges are almost always folded or over-stained.
- 40x objective (400x total) — read the cells. Look at individual cells: shape, nucleus position, and whether a pattern repeats. Most tissue identification happens here — see choosing between the 4x, 10x, 40x and 100x objectives.
- 100x oil objective (1000x total) — only if you need it. Reserved for fine nuclear detail, bacteria, or blood smears. Swinging it through a dry field by mistake is one of the most common ways a teaching scope gets damaged.
Scan with a mechanical stage in a serpentine pattern — left to right, drop one field, right to left — to cover the section without re-reading the same spot.
The Four Questions That Identify Any Tissue
Instead of memorizing dozens of photographs, ask the same four questions of every slide, in order. See OpenStax’s tissue micrograph guide for additional context.
- Is there a free surface or a lumen? A free edge facing open space or a hollow center points to epithelium or an organ wall.
- Are the cells packed together or scattered in matrix? Packed cells point to epithelium; cells scattered in matrix point to connective tissue.
- What is the nucleus doing? Shape, position, and count per cell are the fastest tells for muscle and nerve tissue.
- Does a pattern repeat? A structure recurring across the field — a ring around a canal, a row of nuclei along a line — reveals the tissue’s underlying organization.
What the Pink and Purple Actually Mean
The color scheme on a histology slide is chemistry, not biology. Hematoxylin isn’t quite the dye itself. The working stain is hematein — hematoxylin’s oxidized form — locked to a metal mordant, usually an aluminum salt. That complex is basic, so it binds acidic structures: mainly the phosphate backbone of DNA and RNA. Nuclei, ribosomes, and rough endoplasmic reticulum stain blue-purple, which makes them basophilic. Eosin is the opposite: an acidic dye that binds basic proteins, so cytoplasm, collagen, muscle, and red blood cells stain pink to red — eosinophilic, or acidophilic (Chan, 2014). Eosin isn’t one flat pink: red blood cells are bright orange-red and glassy, collagen a pale fibrous pink, smooth muscle a deeper solid pink, keratin bright orange-pink and flaky.
The familiar blue-purple isn’t automatic, either. Hematoxylin comes out reddish-brown at acidic pH; a rinse in weakly alkaline water — often just running tap water — flips it to blue. Lab staff call it the bluing step, and a slide that skipped it looks muddy brown where it should look purple.
One misconception worth killing: purple does not mean abnormal or cancer. It simply means acidic, nucleic-acid-rich material — a densely purple field usually just means cells are packed tightly or dividing actively.

| Structure | Stain | Color | Why |
|---|---|---|---|
| Nucleus / chromatin | Hematoxylin | Blue-purple | DNA phosphate is acidic |
| Cytoplasm (general) | Eosin | Pink | Basic proteins |
| Collagen / connective matrix | Eosin | Pale pink | Basic proteins |
| Red blood cells | Eosin | Bright orange-red | Hemoglobin is strongly eosinophilic |
| Keratin | Eosin | Bright orange-pink | Dense basic protein |
| Fat / adipose interior | None — dissolved | White, empty | Lipid is removed during processing |
| Myelin (white matter) | None — mostly dissolved | Pale, lacy | Lipid is removed during processing |
Other stains you’ll run into
A few other stains show up often enough to recognize on sight. Masson’s trichrome turns collagen blue or green against red muscle, used to highlight fibrosis. PAS (periodic acid-Schiff) stains glycogen and basement membranes magenta. Immunohistochemistry (IHC) produces a brown signal over a blue hematoxylin counterstain — the “brown and blue” slide — and is antibody-based, not chemistry-based.
The Four Tissue Types and How to Spot Each One
Every tissue in the body is a variation on four basic types. Learning their low-power patterns, not memorizing photographs, is what lets you identify a tissue you’ve never seen before. One note before the field guide: this is a learning exercise, not a diagnosis. Interpreting a slide for disease requires a board-certified pathologist working with clinical history and additional testing.
| Tissue type | Low-power giveaway | Nucleus tell | Example |
|---|---|---|---|
| Epithelium | Packed cells, a clear free surface, sits on a thin basement membrane | Uniform, closely spaced nuclei | Intestinal lining |
| Connective tissue | More pink matrix than cells; cells are sparse and scattered | Nuclei widely spaced, often flattened | Tendon, dermis, cartilage |
| Muscle | Long parallel or branching fibers | Peripheral, central, or single spindle-shaped, depending on type | Skeletal, cardiac, smooth muscle |
| Nervous tissue | Pale, speckled field dotted with small dark nuclei | Neurons are rare and large with a pale nucleus and single dark nucleolus | Brain, spinal cord, peripheral nerve |
Epithelium: packed cells on a free surface
Epithelium is defined by what it lacks: almost no matrix between its cells. It sits on a basement membrane, has a free surface, and has no blood supply of its own. Simple squamous epithelium (alveoli) is a barely-there line with flat nuclei like beads on a wire. Simple columnar epithelium (small intestine) shows tall cells with basal oval nuclei, interrupted by goblet cells as clear pale teardrops. Stratified squamous epithelium, covering skin, flattens toward the surface across many layers — different from what skin cells really look like under a microscope in a fresh smear.

Connective tissue: more matrix than cells
Connective tissue runs on the opposite rule: lots of matrix, cells sparse within it. More pink space than nuclei means connective tissue. Loose areolar tissue shows wispy fibers running every direction with scattered fibroblast nuclei; dense regular tissue, like tendon, shows parallel collagen bundles with flattened nuclei in rows between them. Adipose tissue is easiest to misread — a chicken-wire mesh of empty white circles, since the fat dissolves out during processing, leaving a thin rim and a flattened nucleus. Bone is connective tissue too, once mineral hardens the matrix — see how bone tissue reads under a microscope for the mineralized version of this same rule.
Muscle: three types, told apart by their nuclei
All three types contract, but the nucleus gives each one away instantly.
| Type | Shape | Nuclei | Striations | Distinctive feature |
|---|---|---|---|---|
| Skeletal | Long parallel cylinders | Many, at the periphery | Yes | Multinucleated fibers |
| Cardiac | Branched, shorter | 1–2, central | Yes | Intercalated discs — dark transverse lines |
| Smooth | Spindle-shaped | 1, central, cigar-shaped | No | Arranged in sheets or layers |
See the three types of muscle tissue under a microscope for a closer side-by-side look.
Nervous tissue: mostly glial nuclei, not neurons
Brain tissue is deflating at first: a pale pink field speckled with small dark dots. Most are glial nuclei — glia vastly outnumber neurons, and on H&E only their small dark nuclei are visible, since the cell body is too pale to resolve. Actual neurons are the rare large cells with a pale nucleus and a single dark nucleolus, the “owl eye” look. White matter looks pale and lacy because myelin lipid dissolves out during processing, the same reason adipose tissue looks empty.
What a Histology Slide Actually Is (and How It’s Made)
Most histology slides go through formalin-fixed, paraffin-embedded (FFPE) processing. Technicians preserve the tissue in 10% neutral buffered formalin, dehydrate it through graded ethanol, and run it through xylene, which dissolves lipids. That’s the step responsible for the empty look of fat and myelin later on the slide. Molten paraffin then infiltrates the tissue and sets into a block, which a technician cuts into 4–5 micrometer ribbons on a microtome, floats on a warm water bath, and mounts on a slide. The wax is removed, the section stained (typically H&E), and sealed under a coverslip with a mounting medium matched to glass. Realistic turnaround is 24 hours to several days, dominated by fixation and overnight wax infiltration.
The faster alternative, a frozen section, uses a cryostat instead of wax and produces a readable slide in 10 to 20 minutes for surgery — but ice crystals damage the tissue, leaving morphology visibly rougher than FFPE. Formalin and xylene are both hazardous, handled in a fume hood in a licensed lab. Formaldehyde is a recognized carcinogen (National Cancer Institute) — the honest reason a real slide can’t be made safely at home.
Why a 4-Micron Slice Changes What You See
Here’s the fact behind most beginner confusion: a 4-micrometer section is a slice through a cell, not a whole cell. Most cells are 10 to 30 micrometers across, so the microtome cuts through the middle, the edge, or entirely misses the nucleus at random. That’s why some cells appear to have no visible nucleus.
The same fact explains why a tube-shaped structure can look completely different on two slides. A gland cut straight across shows a clean ring; cut at an angle, a stretched oval. A solid structure cut through its widest point can look like a ball, and near its edge, like a stripe — the same tissue caught at a different plane of section.
Artifacts: The 8 Things That Aren’t Anatomy
Prepared slides pick up marks during processing that have nothing to do with the tissue’s biology.
| Artifact | What it looks like | Cause |
|---|---|---|
| Fold | Dark, sharp-edged band | Section wrinkled on pickup |
| Chatter / knife marks | Parallel scratches, one direction | Dull or vibrating microtome blade |
| Air bubble | Perfect circle, thick dark rim | Trapped under the coverslip |
| Tear or crack | Jagged gap, matching edges | Sectioning or handling damage |
| Retraction (shrinkage) clefts | Clean white halo | Tissue shrank during processing |
| Floater | Fragment of unrelated tissue | Contamination in the water bath |
| Formalin pigment | Brown-black speckle | Formaldehyde reacting with blood |
| Ice crystal holes | Swiss-cheese vacuoles | Frozen sections only |
The fastest way to tell an artifact from real anatomy is the focus-plane test: rack the fine focus up and down. Anything sharp at a different plane than the tissue is sitting on the glass, coverslip, or mounting medium — not in the specimen. Dust, fingerprints, and trapped bubbles all behave this way. If you have not yet worked a slide through every objective, practise first with our compound microscope beginner walkthrough.
Reading Practice: Your First Three Slides
If you’re working through a commercial prepared microscope slide set, three slides are worth reading first: together they cover all four tissue types.
Start with small intestine: finger-like projections at 4x; tall columnar cells with basal nuclei and goblet-cell teardrops at 40x. Next, skeletal muscle in longitudinal section: corduroy-like parallel fibers with faint cross-striations and nuclei on the outer edge, never the middle — the tell that separates it from cardiac muscle. Finish with hyaline cartilage: a glassy, texture-less blue-lilac matrix with chondrocytes in pairs inside lacunae. For more practice, the University of Michigan’s free virtual slide collection at HistologyGuide covers dozens of specimens.
Frequently Asked Questions
What magnification do you need to read a histology slide?
Routine tissue identification happens between 40x and 400x total magnification (eyepiece power times objective power). The 100x oil objective (1000x total) is reserved for fine detail like blood smears.
How long do histology slides last, and can they fade?
A properly sealed slide can last decades, but isn’t permanent. Eosin fades toward gray with years of light exposure, and the mounting medium can yellow — a 20-year-old teaching slide often looks washed out.
What’s the difference between histology and cytology?
Histology examines a thin section cut from a solid tissue block. Cytology examines loose cells smeared directly onto a slide — think reading a blood smear, which is a cytology prep rather than a section. Cultured cells, like the HeLa cell line that made continuous tissue culture possible, are examined the same loose way, never sectioned.
Is histology the same as pathology?
No. Histology is the study of normal tissue structure. Histopathology applies the same technique to diagnosing disease, and requires a trained pathologist reading the slide alongside clinical history and further testing.
Do you need special equipment to start reading histology slides?
No. A standard compound light microscope with 4x, 10x, and 40x objectives covers the full magnification ladder above — the 100x oil objective is a bonus for fine detail, not a requirement to get started. Any compound scope with those objectives works for practicing on a commercial prepared slide set; you don’t need lab-grade equipment to learn to read tissue.
Reading Your Next Histology Slide
A histology slide only looks confusing until two facts click: the pink and purple are chemistry, not biology, and a 4-micrometer slice is a cut through a cell, not the whole cell. Once those land, the four-question method and the five-step magnification ladder turn any slide into something you can read systematically instead of guessing at.
Have you worked through a prepared slide set of your own? Tell us which tissue gave you the most trouble the first time — the comments are a good place to compare notes with other beginners working through the same box.