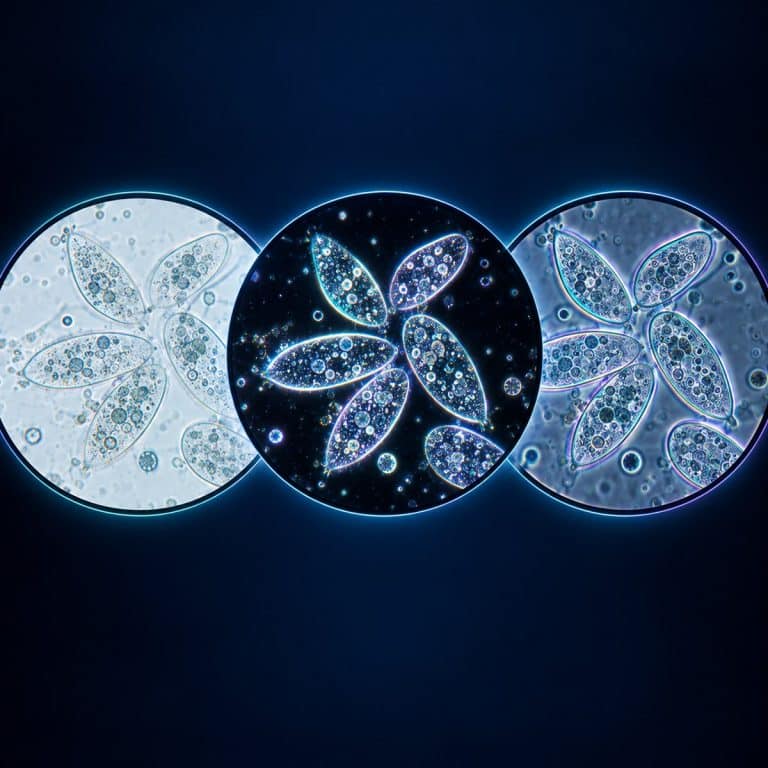
Brightfield, darkfield, and phase contrast microscopy are three ways of lighting the same specimen on the same compound microscope. Each one produces a completely different picture from the identical slide. Brightfield shows you what the specimen absorbs, darkfield shows you what it scatters, and phase contrast shows you what it delays long enough to turn into visible brightness. None of the three lets you see anything smaller than the others — they change what you can distinguish, not how small a detail your microscope can resolve.
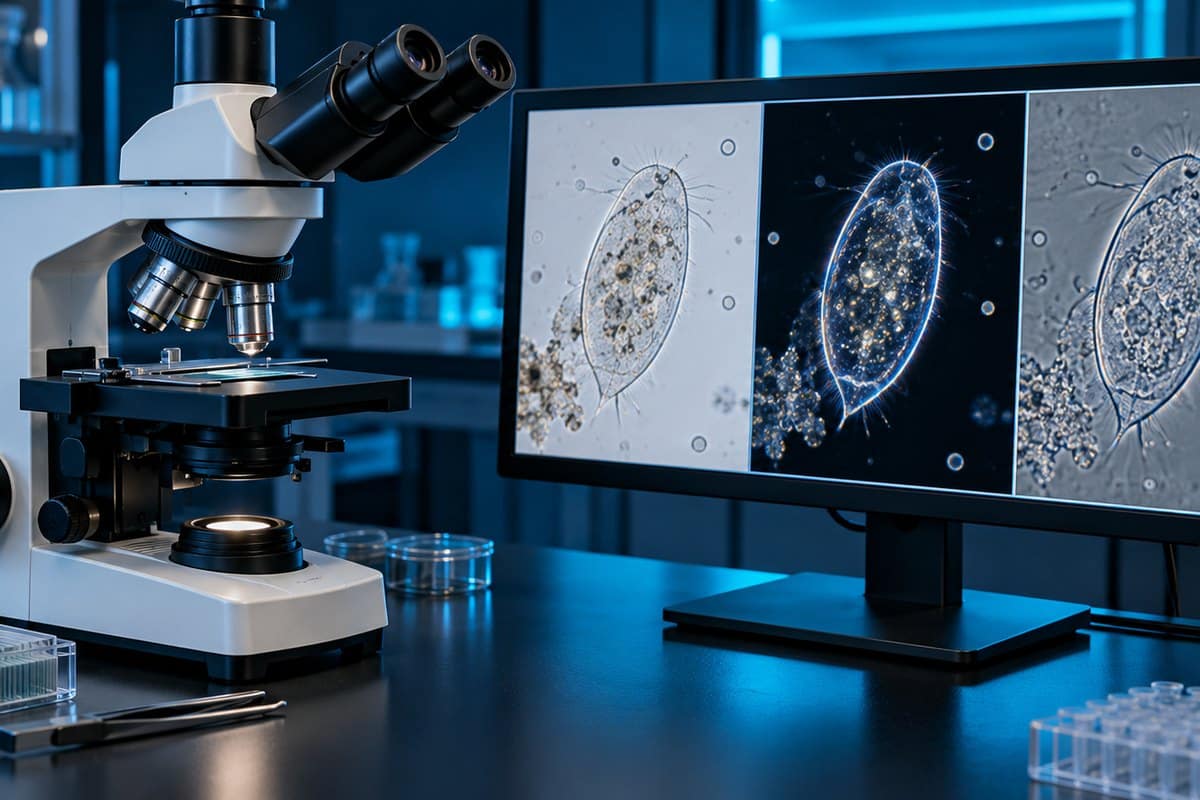
Brightfield vs Darkfield vs Phase Contrast at a Glance
| Technique | What it does to the light path | Background | Specimen appearance | Good for unstained live cells? | Typical specimens | Relative brightness | Main drawback | Cost to add |
|---|---|---|---|---|---|---|---|---|
| Brightfield | Nothing added — a full, unblocked cone of light passes straight through the specimen. | Bright white | Dark specimen on a bright field, visible where it absorbs light. | No — unstained cells barely register. | Stained tissue sections, hair, fibers, naturally pigmented material. | Brightest of the three. | Requires staining, which usually kills or fixes the specimen. | Free — every compound microscope starts here. |
| Darkfield | An opaque patch stop blocks the direct axial rays, leaving only oblique light that misses the objective unless something scatters it in. | Inky black | Brilliant, glowing specimen outline against the black field. | Yes, for outline and motion — but not internal detail. | Diatoms, unstained bacteria, protozoa, fibers, particulates in liquid. | Low — the image is built entirely from scattered light. | Shows a glowing silhouette, not internal structure; very light-hungry. | A few dollars for a patch stop; more for a dedicated condenser. |
| Phase contrast | A condenser annulus and a matched objective phase plate retard the direct light by roughly a quarter wavelength so it interferes with diffracted light. | Light grey | Dark grey specimen with a bright halo tracing every edge. | Yes — the standard method for live, unstained, thin specimens. | Live cell culture, bacteria, protozoa, spermatozoa, mitosis in progress. | Only a few percent of brightfield. | Bright halo artifact; needs a thin specimen and precise alignment. | Moderate to high — a matched turret condenser plus phase objectives. |
| DIC (mention only) | Wollaston/Nomarski prisms split and recombine polarized light, converting the gradient of optical path length into shading. | Neutral grey | Pseudo-3D shadow-relief, as if lit from one side. | Yes, and it tolerates thicker specimens than phase contrast. | Live cells on glass, thicker unstained tissue, embryology. | Moderate. | Expensive; fails through birefringent plastic vessels. | Highest — magnification-matched prisms plus polarizer and analyzer. |
How Each Technique Changes the Light Path
All three sit on the exact same platform — a compound light microscope with a light source, a condenser, and an objective. What differs is what happens to the light between the condenser and the image. See Nikon’s specimen-contrast guide for additional context.
Brightfield: the full cone
Brightfield is the default state of every compound microscope. The condenser delivers a full, solid cone of light straight up through the specimen and into the objective, with nothing added or blocked. Contrast comes entirely from absorption — wherever the specimen absorbs light, the image reads dark. See how a brightfield microscope forms its image for the full mechanics.
Darkfield: block the middle
Darkfield drops an opaque patch stop into the condenser, blocking the axial, zeroth-order rays and leaving an inverted hollow cone of oblique light aimed at the specimen plane. With no specimen present, every one of those oblique rays passes outside the objective’s acceptance angle and the field is black. Anything that scatters, diffracts, or refracts light bends rays into the objective and lights up against that black background. It only works when the condenser’s numerical aperture exceeds the objective’s — our full guide to dark field microscopy covers the setup.
Phase contrast: retard the direct light by a quarter wavelength
Phase contrast uses two matched parts. An annular ring in the condenser produces a hollow cone of illumination. A phase plate etched into the objective’s rear focal plane sits exactly on the image of that ring. The undiffracted light lands on the phase ring and is retarded by about a quarter wavelength and attenuated. Light diffracted by the specimen misses the ring and arrives unaltered. The two beams recombine at the image plane and interfere, converting invisible phase shifts into visible brightness differences. Frits Zernike developed the method in the 1930s and was awarded the 1953 Nobel Prize in Physics for it. The way a phase contrast microscope turns invisible cells visible and the optics behind phase contrast microscopy go deeper on the alignment.
This clip from Microbehunter Microscopy puts the same specimens under brightfield and then phase contrast, side by side. It does not cover darkfield, but it shows exactly what the table above describes.
Which One Should You Use? A Specimen-First Decision Guide
- If your specimen is a stained, prepared slide → use brightfield, because staining already supplies all the absorption contrast you need.
- If your specimen is naturally pigmented or colored material like hair or textile fibers → use brightfield, because pigment absorbs light without any staining step.
- If your specimen is live cells growing in a plastic culture flask → use phase contrast, because it works straight through polystyrene where darkfield and DIC struggle or fail outright.
- If your specimen is small, sparse scatterers suspended in liquid — motile bacteria, spirochetes, diatoms, fine debris — → use darkfield, because it lights up anything that scatters light against a pure black background.
- If your specimen is thick, or you need clean edges without a halo → use DIC, because it tolerates thickness and removes the phase artifact, but only on glass vessels.
- If your budget is close to zero → add a darkfield patch stop first, because it is the cheapest contrast upgrade in microscopy and pond water becomes genuinely spectacular under it.
- If you’re checking whether a cell culture is healthy → use phase contrast, because dying cells turn round, bright, and refractile well before any stain would show it.
What You Actually See Down the Eyepiece
Put unstained human cheek cells under brightfield and you get almost nothing — a faintly milky rectangle. Pinch the iris diaphragm down and ghostly outlines swim into view, but that trick trades away resolution, which is exactly why staining exists. Switch the same slide to phase contrast and the cells snap into being. They become flat grey plates with crisp borders, a soft dark nucleus sitting off-center, and every edge wearing a thin bright outline like it was traced in chalk. See Nikon’s phase-contrast configuration guide for additional context.

For darkfield, a drop of pond water is the fastest comparison you can run. In brightfield it’s a faintly beige field with pale drifting shapes — a paramecium is a grey lozenge you mostly notice because it moves. Switch to darkfield and the background snaps to velvety black. The same paramecium becomes a silver torpedo with a shimmering fringe of beating cilia, and grit flares as hard white sparks. Look for its nucleus or food vacuoles, though, and they’re gone — darkfield gives you a brilliant outline and almost no interior.
The single most common beginner mistake is running a phase objective with the condenser turret still set to brightfield, or vice versa. The image washes out to flat grey with no contrast at all, and it’s easy to assume the phase kit is faulty. The real fix is just matching the turret position (Ph1, Ph2, Ph3) stamped on the objective barrel. In darkfield, the equivalent mistake is closing the condenser iris out of brightfield habit. Darkfield needs that iris wide open, or the hollow cone collapses and the field goes dim grey instead of black.
None of These Techniques Improve Resolution
Resolution in a light microscope is set by the Abbe equation, d = λ / (2 NA). Here, d is the smallest resolvable distance, λ is the wavelength of light, and NA is the numerical aperture. With green light at roughly 550 nm and an oil-immersion objective at NA 1.4, d works out to about 0.2 µm (200 nm). That number is identical whether you’re looking through brightfield, darkfield, or phase contrast, according to Evident’s overview of contrast in optical microscopy.

What changes between the three techniques is contrast, not resolving power. The human eye needs roughly 2% contrast to tell a specimen detail from its background, and unstained living cells routinely fall below that threshold under brightfield. That’s the entire reason darkfield and phase contrast exist. Darkfield and phase contrast let you distinguish detail you were already resolving but couldn’t previously see against the background; they do not let you resolve anything smaller. The only routes past the 0.2 µm diffraction limit are electron microscopy and super-resolution methods, both of which work on entirely different physics.
Reading the Artifacts: Halo, Shade-Off, and Glare
Phase contrast’s bright halo tracing every cell edge is optical, not biological — it’s a byproduct of the phase plate, and beginners routinely mistake it for the cell membrane. A related artifact, shade-off, makes large, uniformly thick objects fade toward the center until the interior reads at nearly background brightness and looks hollow; it isn’t. Both artifacts get worse on thick or overlapping specimens, which is why phase contrast wants a thin, ideally monolayer, preparation.
Darkfield has its own failure mode: because the entire image is built from scattered light, it’s rich in glare. Per Nikon’s MicroscopyU notes on darkfield illumination, it cannot be treated as a faithful geometric reproduction of the specimen. It also punishes dirt mercilessly — a dust speck or fingerprint smear scatters light exactly as efficiently as your specimen. A slide that looks fine in brightfield can be unusable in darkfield until both surfaces are properly cleaned.
Where DIC Fits as a Fourth Option
Differential interference contrast, developed by Georges Nomarski in the early-to-mid 1950s, uses modified Wollaston prisms to split illumination into two polarized beams sheared by less than the resolution limit. It then recombines them so contrast tracks the gradient of optical path length rather than its absolute value. The result is a convincing pseudo-three-dimensional relief, as if the specimen were lit from one side — Leica’s DIC primer is worth reading if you want the full prism geometry. It’s a common misreading: that relief is not real topography, just a rendering of path-length differences.
DIC has no halo and tolerates thicker specimens than phase contrast, at the cost of matched prisms per magnification plus a polarizer and analyzer. It also fails through birefringent plastic culture vessels — glass only. Phase contrast’s ability to work through a plastic flask is exactly the advantage DIC gives up.
Cost and Upgrade Path
From cheapest to most expensive:
- Brightfield — free, it’s the default state of the microscope you already own.
- Darkfield patch stop — a few dollars for a card disc or a simple insert; the best value upgrade in microscopy.
- Dedicated dry darkfield condenser (roughly NA 0.8–0.95) — sharper, more even illumination than a patch stop.
- Phase contrast kit — a turret condenser plus magnification-matched phase objectives; only worth buying matched, since a generic turret with mismatched objectives gives disappointing, hard-to-diagnose contrast.
- Oil-immersion darkfield condenser (roughly NA 1.2–1.4) — needed for darkfield at high, oil-immersion magnifications.
- DIC — the most expensive step, with prisms, polarizer, and analyzer matched per objective.
Frequently Asked Questions
Can you convert a normal microscope to darkfield?
Yes, on many compound microscopes. A simple opaque patch stop dropped into the condenser’s filter holder is enough to try darkfield, provided the condenser’s numerical aperture can be made to exceed the objective’s. This often means using a lower-NA objective, or one with a built-in iris to throttle its own aperture down.
Which contrast technique is cheapest to add?
Darkfield. A patch stop costs a few dollars and drops straight into an existing condenser, which is far less than a matched phase contrast turret or a DIC prism set.
Does phase contrast work through a plastic culture flask?
Yes — this is one of phase contrast’s most practical advantages. It works straight through polystyrene, letting you assess live adherent cells without opening the flask. DIC cannot do this because plastic is birefringent and scrambles the polarized light DIC depends on.
Can you use phase contrast on a stained specimen?
You can, but it’s rarely worth it. Phase contrast exists to reveal specimens that are transparent and unstained. Once a specimen already absorbs light well enough for brightfield, the phase halo just adds visual noise without adding information.
What is Hoffman modulation contrast, and how is it different from phase contrast?
Hoffman modulation contrast is a separate technique that uses a slit aperture in the condenser and a modulator plate in the objective to shade optical gradients into a relief-like image. It is similar in spirit to DIC but without polarized light. It avoids the phase halo but is less common than phase contrast or DIC in most teaching and research labs.
Conclusion
Brightfield, darkfield, and phase contrast are three ways of asking the same specimen a different question — does it absorb light, does it scatter light, or does it delay light. The answer decides which one belongs on your stage. None of them buys you extra resolving power; they only change what becomes visible at the resolution your objective already has. Start with brightfield for anything stained or naturally pigmented, and reach for a darkfield patch stop when you want scatterers to glow. Invest in phase contrast the moment you need to watch live, unstained cells day after day.
Have you compared the same slide under more than one of these techniques? Tell us what you saw — and what surprised you — in the comments below.