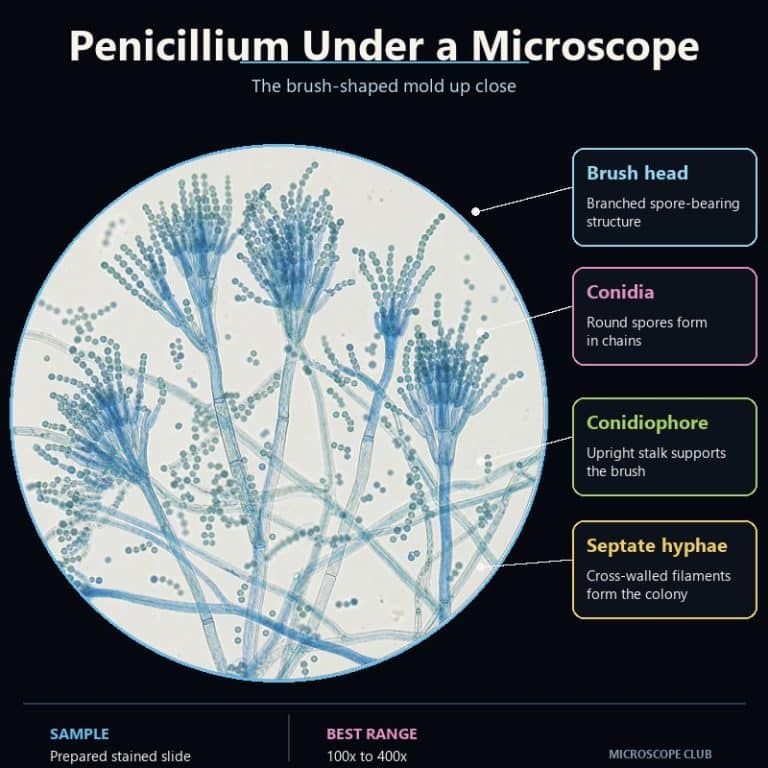
Penicillium under a microscope reveals a blue-green mold whose stalk branches into a tiny brush — the penicillus — that holds long chains of round spores. That brush shape is also the fastest way to separate Penicillium from Aspergillus, the mold it gets confused with most often. This guide walks you through preparing a slide, what appears at each magnification step, and the single structural giveaway that settles the identification every time.
The Brush: Penicillium’s Anatomy From Hyphae to Spores
Penicillium builds its whole visible structure from the ground up, and reading it in that order is what makes the penicillus click into place instead of looking like random tangle. The mycelium starts as hyphae — thin, thread-like, often cross-walled (septate) filaments roughly 1.5–5 µm wide. Hyphae are hyaline, meaning colorless and effectively transparent under transmitted light, which is why the fungus needs the massed spores further up the structure to show any color at all.
From that mat, an erect stalk called the conidiophore rises and branches near the top, about two-thirds of the way up its length. That branching is the detail to watch for: an unbranched stalk is a different mold entirely (more on that below). The conidiophore’s branches are called metulae — secondary branches that carry the next structure in the chain.
Sitting on the metulae, in whorls of roughly three to six, are phialides: flask-shaped (ampulliform) cells with a cylindrical base and a narrow neck. Phialides are the spore factories — each one produces a chain of conidia, single-celled spores about 2.5–5 µm across, ranging from globose to ellipsoidal. The spores form in long, dry chains in basipetal succession, meaning the youngest spore sits at the base of the chain next to the phialide, while the oldest spore is pushed out to the tip.
Put the whole branched cluster together — metulae, phialides, and their spore chains — and you have the penicillus, the brush or broom shape that gives the genus its name. It comes from the Latin penicillus, meaning “little brush.” Some species show extra branching stages (biverticillate or terverticillate arrangements versus the simpler monoverticillate form, as detailed in the University of Adelaide’s mycology reference). You won’t identify Penicillium to species by eye, though, so treat that detail as background rather than something to hunt for.
What each part does
Think of it as an assembly line: the conidiophore is the stalk that lifts the whole structure clear of the mycelium mat. The phialides are the cells that actually manufacture spores, and the conidia are the finished spores released into the air to start new colonies. Once you can name each part on sight, the anatomy stops looking like noise.
How to Prepare and View a Penicillium Slide
You don’t need a fresh culture to see Penicillium — a spot of blue-green mold on old bread, citrus peel, or cheese is usually enough. Here’s how to get it onto a slide and under the objective:

- Find a sample with a visible blue-green center and a clean white growing margin at the edge — that white ring is young hyphae that haven’t produced spores yet, and it’s a good sign the colony is active rather than dried out.
- Tease off the tiniest wisp of mold using a needle or the tip of a toothpick. Resist the urge to grab a visible clump.
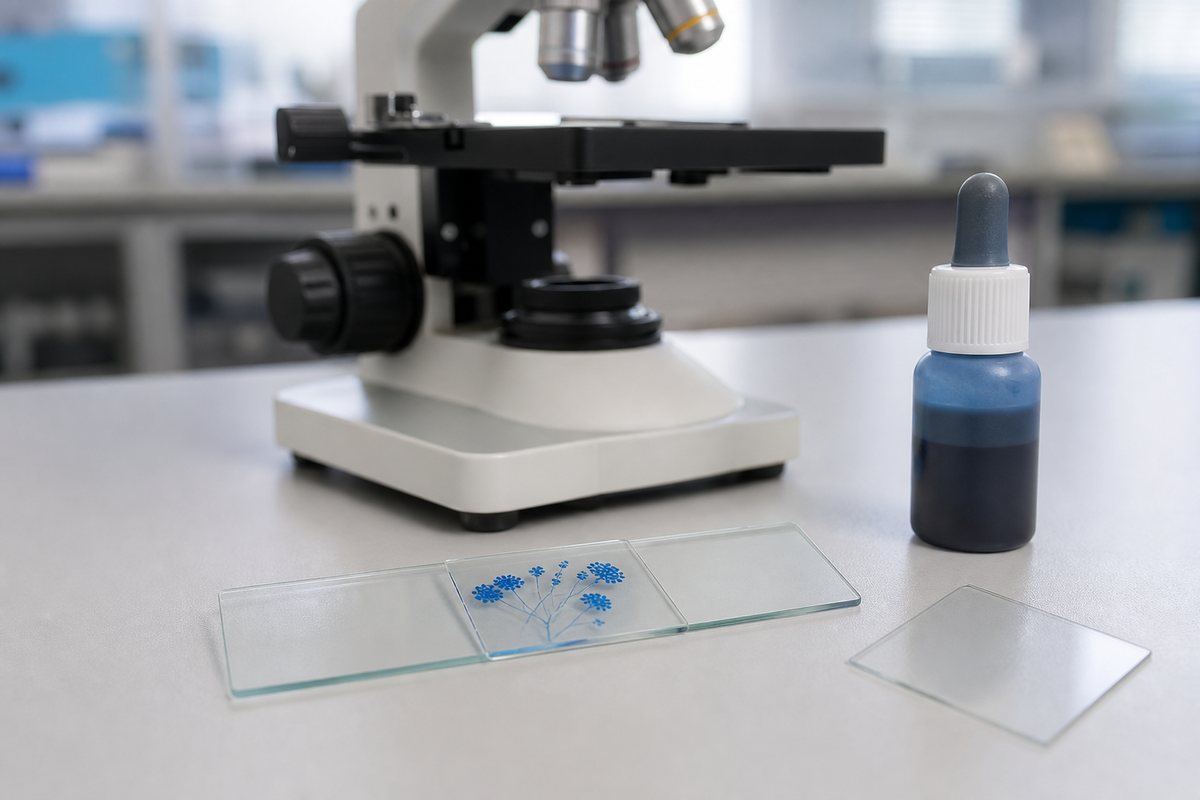
- Prepare a wet mount slide by placing the sample in a drop of water, or better, a drop of lactophenol cotton blue stain if you have it — the classic mycology stain that makes the otherwise colorless brush stand out clearly against the background.
- Lower the coverslip gently at an angle rather than dropping it flat, and expel any air bubbles as you go.
- Scan at low power first (40x) to locate a lone conidiophore standing clear of the dense mat, then step up through the objectives to bring it into full detail.
See our guide to preparing microscope slides for more on mounting technique in general.
Two mistakes ruin this prep more than any other. First, grabbing too much mold: a thick clump turns opaque and reads as a black blob with no visible structure, so less is genuinely more. Second, pressing the coverslip down hard — the conidiophore is a delicate three-dimensional structure, and squashing it flat destroys the very brush shape you’re trying to see. Lower the coverslip, don’t press it.
What You See at 40x, 100x, and 400x
Penicillium looks completely different at each step up in magnification, and knowing what to expect at each stage keeps you from thinking your slide prep failed.

At 40x, you’ll see a tangled gray mat of thread-like stalks — something like a pile of tossed hair. There’s no real detail yet; this stage is purely for locating a well-separated stalk worth zooming in on. Hunting for the brush structure directly at 400x on a dense clump is close to hopeless, so don’t skip this step.
At 100x, the tips of the stalks start resolving into shapes that look like squashed flowers or sea-anemone tentacles. You can tell something structured is happening at the ends of the conidiophores, but the image is still soft, more suggestion than detail.
At 400x, the payoff arrives: the brush snaps into full 3D. A stalk splits into finger-like branches, each tipped with a flask-shaped phialide trailing a beaded chain of tiny round spores — like strings of microscopic pearls fanning out from a broom head. The following video shows this progression on a live Penicillium mount, matching the moving footage to exactly what’s described here:
One color note worth setting expectations for: don’t expect vivid green like a plant cell. Individual hyphae, conidiophores, and even single spores are near-colorless under the scope — the green tint only appears as a mass effect from thousands of stacked spore chains. Cranking up the light looking for color you won’t find just washes out the pale structures further; if anything, stop down the iris diaphragm to increase contrast on the hyaline parts.
Two practical notes while you’re at this stage: Penicillium spores are dry and puff into the air easily when the colony is disturbed, so work gently and avoid breathing directly over the sample. And at high magnification under lamp heat, a wet mount can dry out faster than you’d expect — work at a reasonable pace once you’ve found your structure. MicroscopeMaster’s Penicillium microscopy guide has additional reference photos if you want to compare your slide against a known-good mount.
If you haven’t settled on your setup yet, our guides to the 4x, 10x, 40x, and 100x objective lenses and how to calculate total magnification cover the math behind these numbers.
Penicillium vs Aspergillus: How to Tell Them Apart
Penicillium and Aspergillus are the two molds most often mixed up, and the good news is that one structural feature settles the question every time: the tip of the conidiophore. Penicillium’s conidiophore branches into the brush-shaped penicillus described above, with no swelling anywhere along its length. Aspergillus takes a completely different route — its conidiophore stays unbranched all the way up, then ends in a swollen round vesicle, with phialides radiating directly off that ball in every direction like a dandelion seed head or a lawn sprinkler.
If you see a ball at the top of the stalk with spore-producing cells radiating from it, you’re looking at Aspergillus, not Penicillium. If you see a stalk that branches into finger-like divisions before the spore-bearing cells appear, with no ball anywhere, that’s Penicillium.
| Feature | Penicillium | Aspergillus |
|---|---|---|
| Conidiophore shape | Branched (metulae partway up) | Unbranched, straight stalk |
| Vesicle | Absent | Present — swollen terminal bulb |
| Overall silhouette | Paintbrush / broom head | Dandelion / sprinkler head |
| Phialide arrangement | On branched metulae | Radiating from the vesicle surface |
| Spore chains | Dry chains from the brush tips | Dry chains from the vesicle head |
Not every blue-green mold you find on food is automatically Penicillium — but running the brush-versus-vesicle test on a slide will tell you which genus you actually have. For a closer look at how the conidia themselves differ between the two genera, Medical Lab Notes’ comparison of Aspergillus and Penicillium conidia goes deeper into the spore-level distinctions.
Where You’ll Find Penicillium
Penicillium turns up most often as the fuzzy blue-green patch on bread mold under a microscope, but it’s just as common on citrus peels, cheese rinds, and damp indoor surfaces like bathroom grout or window frames. Two species get put to deliberate use rather than treated as contamination: P. roqueforti is cultured on purpose to ripen blue cheese, and P. camemberti forms the white or pale rind on Camembert and Brie. The genus also has a famous historical footnote — Alexander Fleming isolated the antibiotic penicillin from P. rubens (long classified as P. chrysogenum) in 1928. Penicillin itself is a metabolite only some species produce, though, not a property of the mold as a whole.
A short safety note before you go looking for your own sample: some Penicillium species can produce mycotoxins, and mold spores are a known allergy trigger for some people. Handle mold samples in a ventilated space, avoid inhaling directly over a disturbed colony, and wash your hands afterward. This article is educational, not medical or food-safety advice, and it makes no claim about whether any specific moldy food is safe to eat.
Curious about other microbes hiding in everyday food? Our pieces on yeast, another common fungus, and the microbes in yogurt are good next stops, as is our look at pollen grains under a microscope if you want another common slide subject. All of these are viewable on a standard compound light microscope — nothing exotic required.
Frequently Asked Questions
Is Penicillium the same thing as penicillin?
No. Penicillium is the mold (a living organism); penicillin is a chemical compound that only certain Penicillium species, such as P. rubens, produce as a metabolite. Related, but not the same thing.
Is Penicillium mold dangerous, and is it safe to touch?
Some species can produce mycotoxins and mold spores can trigger allergic reactions in sensitive people. Handle samples in a ventilated area, avoid breathing directly over a disturbed colony, and wash your hands afterward. This is general educational guidance, not medical advice.
What color is Penicillium under the microscope?
Individual structures — hyphae, conidiophores, and single spores — are largely hyaline (colorless to near-transparent). The blue-green color you see is a mass effect that only appears once thousands of spores are packed together in chains.
Can I use a stain other than lactophenol cotton blue?
Yes — hematoxylin also works well for making the colorless conidiophore and phialides stand out. A plain water mount will work in a pinch but gives much lower contrast.
Do I need a specialized microscope to see the penicillus?
No. A standard compound light microscope capable of reaching 400x is enough to resolve the brush and spore chains clearly — nothing exotic like phase contrast or a scanning electron microscope is required.
Conclusion
Once you know the order the structures build in — hyphae, conidiophore, metulae, phialides, conidia — the penicillus stops looking like a tangle and starts looking like exactly what its name promises: a brush. And the moment you can spot a branched, vesicle-free stalk versus Aspergillus’s unbranched ball-topped one, the two molds that trip up most beginners become easy to tell apart on sight.
Have you found Penicillium on something around your own kitchen? Tell us what you found it on and what it looked like under your scope in the comments below — and if you’ve spotted Aspergillus’s dandelion-head vesicle instead, we’d love to hear about that comparison too.
Related Specimen
For a comparison, see our full Aspergillus mold review — another common mold specimen with a distinct structure of its own.
Originally posted 2026-08-01 12:00:00.