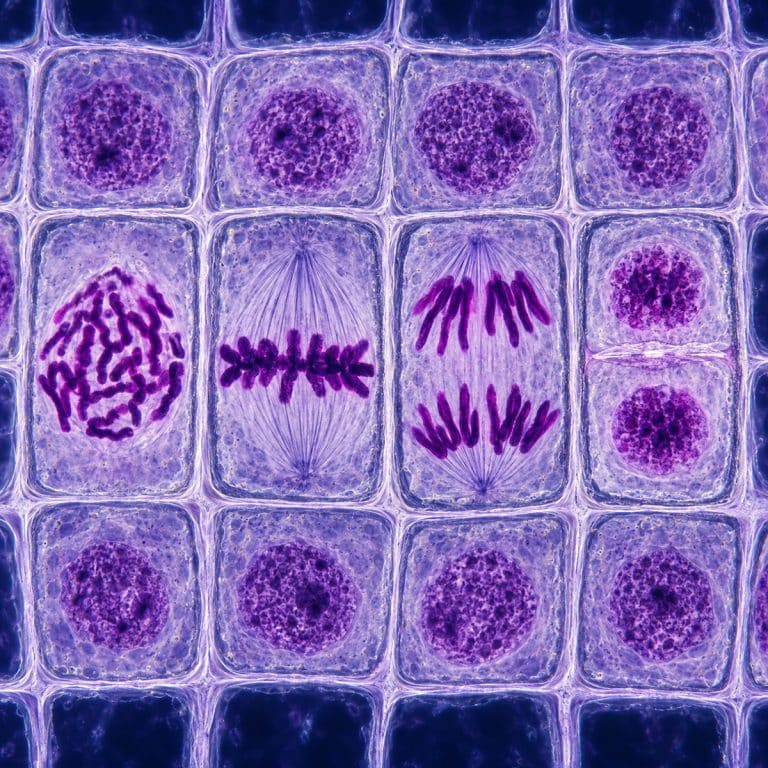
Mitosis under a microscope looks nothing like the tidy textbook diagram: it’s a handful of cells with dark, condensed chromosomes scattered among a much larger crowd of plain, pale interphase cells. The best place to see all four stages at once is a stained onion root tip squash viewed at 400×, where the actively dividing zone sits just behind the growing tip. This guide shows you how to prepare that slide, exactly where to focus, and how to recognize prophase, metaphase, anaphase, and telophase the moment they appear.
Why the Onion Root Tip Is the Slide to Use
The onion root tip earns its place as the classic mitosis specimen for two practical reasons. First, its apical meristem — the growing point just behind the root cap — is packed with cells that divide constantly, so you don’t have to search a whole tissue for a rare event. Second, onion (Allium cepa) has large, bold chromosomes (2n = 16) that take up stain heavily and stand out clearly even on a basic compound microscope. Add to that the fact that onions are cheap and sprout roots in days on a windowsill, with no special growing conditions required. That combination is the reason this one specimen shows up in nearly every introductory biology lab. OpenStax’s root anatomy guide identifies the actively dividing zone near the root tip.
How to Prepare an Onion Root Tip Mitosis Slide
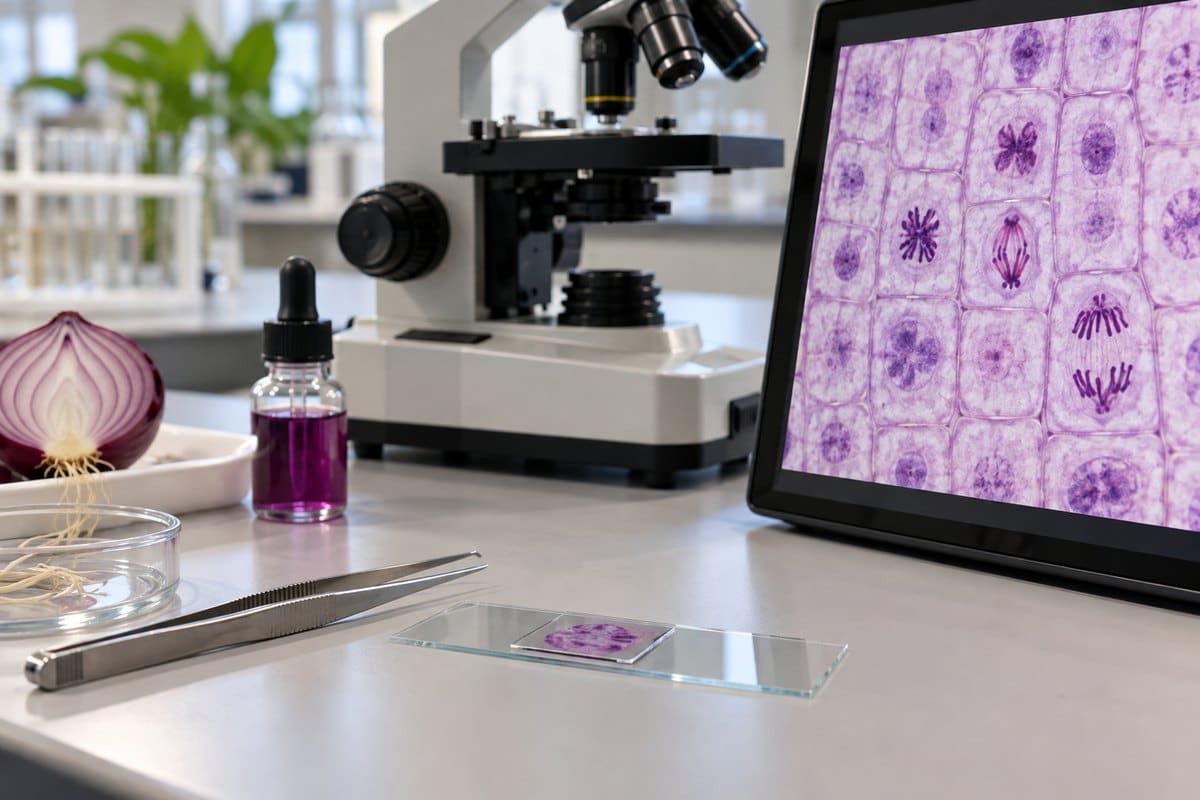
Making your own squash slide is straightforward chemistry and a bit of technique. Follow these steps in order:
1. Grow the Roots
Suspend an onion (bulb-down) over a jar of water so the base just touches the surface. Within 3–5 days you should have roots roughly 2 cm long. Harvest tips from roots that are actively growing — thick, white, and firm — rather than old or brown ones.
2. Cut, Fix, and Hydrolyze
Snip the terminal 1 cm of a root tip and fix it in Carnoy’s solution or acetic alcohol for about 15–20 minutes to stop cell activity and preserve chromosome structure. Rinse briefly, then hydrolyze in warm 1M HCl for around 5 minutes — this softens the cell walls enough that the tissue will flatten into a single layer later. Getting this step right matters more than any other. Over-hydrolyze and the tissue turns to mush with no intact cells; under-hydrolyze and the walls stay stiff, so the squash never spreads thin enough to focus through.
3. Stain and Squash
Transfer the softened tip to a drop of aceto-orcein or toluidine blue on a clean slide and let it stain for several minutes — the chromosomes should take on a deep purple or blue color. Lower a coverslip over the tissue, cover it with a folded paper towel, and press straight down once, firmly, with your thumb or a pencil eraser. Don’t twist or rock the coverslip; a single firm, vertical press spreads the cells into one layer without smearing them. Too gentle a press leaves overlapping clumps you can’t bring into focus; too hard smears the cells past recognition.
If growing and squashing your own slide isn’t practical, buying a prepared onion root tip mitosis slide is a completely valid shortcut. It guarantees you’ll actually see dividing cells on your first try, which is worth a lot for a beginner still learning to recognize the stages.

Where to Look on the Slide — Find the Dividing Zone
The single biggest reason beginners report seeing “no mitosis at all” is that they’re looking in the wrong part of the root. Dividing cells are concentrated in the apical meristem, a narrow band roughly 1–3 mm behind the very tip of the root, just above the root cap. The root cap itself and the elongation zone further up the root have few or no dividing cells. The root cap is mostly protective tissue, and cells in the elongation zone have already finished dividing and are simply growing longer.
Start scanning at 100× to locate this slightly denser, more opaque band, then switch to 400× (a 10× eyepiece times a 40× objective) once you’re over it. If you want to resolve the fine structure of individual chromosomes rather than just spot the stage, step up further to 1000× under oil immersion. Work through the meristem systematically in a grid pattern rather than wandering at random. Dividing cells are the exception, not the rule, so a methodical scan finds them faster than a hopeful one.
The 4 Stages of Mitosis Under the Microscope
Mitosis itself consists of four stages — prophase, metaphase, anaphase, and telophase — often remembered by the mnemonic PMAT. Interphase, the period of growth and DNA replication between divisions, is not one of these stages, even though it’s what you’ll see in the overwhelming majority of cells on your slide. Its cell-cycle guide illustrates how chromosomes behave through the stages of mitosis.

Interphase (the Baseline You’ll Mostly See)
Interphase cells fill most of the field of view, and once you know what to ignore, spotting the real stages gets much faster. Each one looks like a pale gray box with a single dark freckle inside — that freckle is the nucleolus sitting in an otherwise smooth, evenly-shaded nucleus. Nine cells out of ten on a typical meristem slide will look exactly like this. It’s tempting to assume something has gone wrong when so few cells are dividing, but that ratio is normal and expected. Mitosis is a brief event relative to the whole cell cycle.
Prophase
Prophase is the moment a nucleus stops looking calm. The smooth gray blob of interphase chromatin condenses into a dark, tangled scribble — if you’re using an orcein stain, it reads as a knot of purple thread packed into the nucleus. Each chromosome is now two sister chromatids joined at a centromere, though at this stage they’re still too tangled to count individually. The nucleolus fades from view and the nuclear envelope starts to break down as spindle fibers begin forming around the cell.
Metaphase
Metaphase is the one stage you’ll spot instantly, even at a glance. The chromosomes line up single-file along the metaphase plate at the cell’s equator, spindle fibers attaching to each centromere through structures called kinetochores. On the slide this appears as a hard, dark line ruled straight across the middle of the cell — unmistakable. It’s the easiest stage to use as your first landmark while you’re still learning to tell the others apart.
Anaphase
Anaphase separates the sister chromatids and pulls them toward opposite poles of the cell, centromeres leading the way so each chromatid trails into a small V shape behind it. Through the eyepiece this looks like two dark clots being dragged apart, a clear gap opening down the middle of the cell as they go. It’s a brief stage, so if you find one, watch the surrounding cells closely — you’re clearly in an actively dividing patch of tissue.
Telophase and Cytokinesis
Telophase brings the separated chromosomes to each pole, where they de-condense back into loose chromatin while two new nuclear envelopes form around them and nucleoli reappear. On the slide you’ll see two separate, newly forming gray blobs at opposite ends of the once-single cell. Plant cells like onion handle the final split differently from animal cells. Instead of pinching inward with a cleavage furrow, they build a cell plate across the middle that will become the new cell wall. Look for this as a faint, straight hairline forming between the two telophase nuclei — it’s easy to miss the first few times but obvious once you know to look for it.
| Stage | What the chromosomes do | What you see on the slide | How common it is |
|---|---|---|---|
| Interphase | Diffuse, uncondensed chromatin | Pale gray box with one dark nucleolus | ~90%+ of cells |
| Prophase | Condense into visible chromosomes | Dark, tangled scribble inside the nucleus | Uncommon |
| Metaphase | Align at the cell’s equator | Hard dark line across the cell’s middle | Rare, but unmistakable |
| Anaphase | Sister chromatids separate, pulled to poles | Two dark clots trailing into V shapes | Rare and brief |
| Telophase | De-condense at each pole; envelopes reform | Two forming nuclei, sometimes a faint cell-plate line | Rare |
To see all four stages identified on a real slide in motion rather than in still photos, this walkthrough is a useful companion while you’re learning to match live footage to the descriptions above:
For a deeper look at the structures inside a resting onion cell before it starts dividing, see how onion cells look under a microscope — the cell wall, vacuole, and nucleus you’ll learn to recognize there are the same starting point every dividing cell begins from. The phases of mitosis overview from Khan Academy is a solid reference if you want the underlying cell-biology detail behind each stage.
How to Calculate the Mitotic Index
The mitotic index gives you a number instead of just an impression: the actual percentage of cells in a field that are caught in some stage of mitosis. It’s a real function these slides are used for beyond simple identification:
Mitotic Index (%) = (number of cells in mitosis ÷ total number of cells counted) × 100
Worked example: scan a field and count 200 cells total. Of those, 24 show visible signs of mitosis — anywhere from prophase through telophase counts. The calculation is:
MI = (24 ÷ 200) × 100 = 12%
A higher mitotic index means a faster-dividing tissue — meristem tissue from actively growing roots typically scores higher than older, more mature tissue. Biology labs use exactly this calculation to compare growth rates between samples, or to test whether a chemical, temperature, or other treatment speeds up or slows down cell division. Counting a full 200 cells by hand takes patience, but the formula itself is simple once you have real slide data to plug in.
Mitosis vs. Meiosis vs. Cancer — Quick Context
Everything you’ll see on an onion root tip slide is mitosis, not meiosis. Root tips divide to produce two genetically identical daughter cells for growth, while meiosis (which produces genetically varied reproductive cells) happens in a completely different part of the plant, the flower’s anthers. If you’re working with onion tissue, meiosis simply isn’t on the slide.
Mitosis is also, in a sense, what goes wrong in cancer cells, where mitosis runs unchecked. Healthy tissue divides on a tightly controlled schedule; cancer arises when that control breaks down and cells keep entering mitosis far more often than they should. It’s worth knowing this connection exists, but the mechanism is a much longer topic than a root tip slide can show — this article stays focused on identifying the normal process.
Common Mistakes and How to Fix Them
A few errors account for most failed attempts at this slide, and all of them are fixable:
- Looking at the wrong zone. Beginners often focus on the root cap or the long, clear elongation-zone cells further up, where there’s little to no division happening. Aim specifically for the slightly opaque band 1–3 mm behind the tip — that’s the meristem.
- Expecting every cell to be dividing. If nine out of ten cells look like plain interphase boxes, that’s normal, not a failed prep. Scan patiently; dividing cells are the exception you’re hunting for, not the default.
- Squashing incorrectly. A gentle press leaves cells clumped in three dimensions, so you can never get a clean focal plane. A twisting or overly hard press smears them past recognition. One firm, straight-down press through the coverslip is the technique that works.
- Too much light washing out the stain. A wide-open condenser diaphragm floods the field with light and can wash out the contrast between stained chromosomes and the surrounding cytoplasm. Stop down the condenser diaphragm until the chromosomes stand out clearly against the background.
Building good habits for preparing your own microscope slides in general will make this specific prep easier. If you want to compare the squash method against a simpler technique, see how it differs from making a wet mount slide.
Frequently Asked Questions
Why do my chromosomes look pale instead of deep purple after staining?
Usually the stain didn’t have enough time to bind — leave the tip in the aceto-orcein or toluidine blue for the full few minutes rather than rushing it. A weak or old stain solution is the other common culprit, since these dyes lose potency once mixed and stored for more than a few days. If both the timing and the stain itself check out, the tissue may have been under-hydrolyzed, since stiff, unsoftened cell walls can also block the dye from penetrating fully.
How long does it take to prepare an onion root tip slide?
Growing the roots takes the longest — plan on 3–5 days for a suspended onion bulb to produce roots around 2 cm long. Once you have a root tip in hand, the fixing, hydrolyzing, staining, and squashing steps together take about 30–45 minutes. Prepared commercial slides skip the wait entirely if you want to see the stages the same day.
What stain is best for seeing chromosomes?
Aceto-orcein and toluidine blue are the two most common choices for a home or classroom onion root tip squash, and acetocarmine works well too. All three bind to chromosomal DNA and turn the condensed chromosomes a deep purple or blue, making them stand out sharply against the lighter cytoplasm.
Can you see mitosis in animal cells too?
Yes, though it’s harder to find and less visually dramatic than in a plant root tip. Whitefish blastula slides are the classic animal-cell alternative used in labs, since without a rigid cell wall, animal cells pinch inward with a cleavage furrow instead of building a cell plate. You can also see actively dividing cells in a much less dramatic form when examining human cheek cells under a microscope, though most cheek cells you’ll catch are shed, non-dividing epithelial cells.
Do I need a specific onion variety, or does any onion work?
Any culinary onion works, since all common varieties — white, yellow, red — belong to the same species, Allium cepa, and share the same large, easily stained chromosomes. What matters far more than variety is freshness: pick a bulb that hasn’t started drying out, since it needs to sprout healthy, actively growing roots within a few days. Garlic and other Allium relatives will also grow dividing root tips if you want to compare species.
Conclusion
Once you know to expect a field dominated by quiet interphase cells punctuated by the occasional dramatic metaphase plate or anaphase split, mitosis under a microscope stops being an abstract diagram. It becomes something you can reliably find and name on your own slide. The onion root tip does most of the work for you — big chromosomes, a densely dividing meristem, and a prep you can make with a windowsill onion and basic lab chemicals.
Have you tried making your own onion root tip squash? Which stage did you spot first — the unmistakable metaphase bar, or something trickier like an early prophase? Tell us what you found in the comments below.