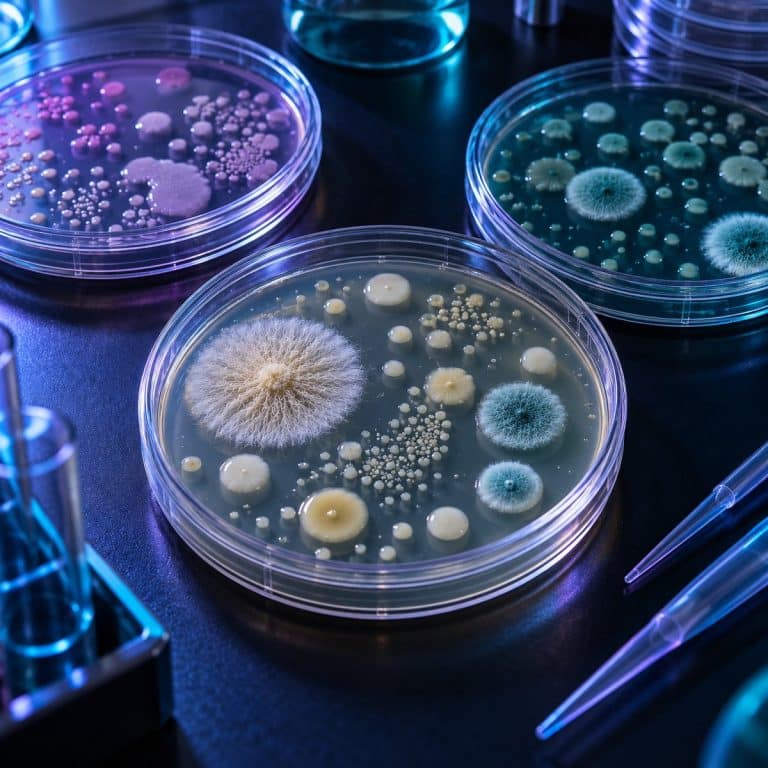
Agar plates at home turn a compound microscope from a pond-scum viewer into a real culturing setup — a Petri dish holding a set layer of nutrient jelly. You make one by stirring agar powder into cold water and bringing it to a full boil, then sterilizing it in a pressure cooker at 15 psi for 15–20 minutes. Cool it to about 122°F (50°C), then pour roughly 20 mL per dish and let it set. Streak a sample onto the surface, leave it at room temperature for two to three days, and you have your first colonies. Expect to spend about $25–40 if you already own a kitchen scale and a pressure cooker, closer to $65 if you’re buying everything, plus roughly 45 minutes of active time per batch.
What You Need to Make Agar Plates
Most of this is already in your kitchen or a one-time buy: See ASM’s teaching-lab biosafety guidelines for additional context.
| Item | Approx. cost | Substitute? |
|---|---|---|
| Agar powder or pre-mixed nutrient agar | $10–15 | None — gelatin does not work (see below) |
| Petri dishes (10–25 pack) | $8–12 | Small glass jars with loose lids in a pinch |
| Stovetop pressure cooker | $0 if you own one | None — boiling alone will not sterilize |
| Heat-safe measuring jug or flask | $5–10 | A Pyrex measuring cup works fine |
| Kitchen scale (0.1 g accuracy) | $10–15 | None — concentration is unforgiving of guesswork |
| Inoculating loop or sterile cotton swabs | $3–8 | A sterile swab is the easier beginner option |
| 70% isopropyl alcohol | $3–5 | None — 99% evaporates too fast to penetrate cell walls |
| Tape (for sealing lids) | Household item | Any tape that holds under refrigeration |
Which Agar Should You Use?
Agar itself is not food. It’s a polysaccharide extracted from red algae — chiefly Gelidium and Gracilaria — providing structure, not nutrition, as Science Buddies explains. Most bacteria can’t even digest it; the food is whatever you dissolve alongside it: peptone, beef or yeast extract, dextrose. Which base you use depends on what you’re growing: See OpenStax’s microbial-growth overview for additional context.
| Medium | Composition (per 1 L water) | What it’s for |
|---|---|---|
| Nutrient agar (classic) | 5 g peptone, 3 g beef extract, 15 g agar | General-purpose bacteria — the default first batch |
| LB (lysogeny broth) agar | 10 g tryptone, 5 g yeast extract, 10 g NaCl, 15 g agar | Richer; the standard for growing E. coli under a microscope |
| Potato dextrose agar (PDA) | 200 g potato infusion, 20 g dextrose, 15 g agar | Molds and yeasts |
| Sabouraud dextrose agar | 10 g peptone, 40 g dextrose, 15 g agar | Fungi — low pH suppresses bacteria |
| Malt extract agar | 20 g malt extract, 20 g agar | Favored by mushroom-culture hobbyists |
Standard concentration is 1.5% w/v — 15 g per liter. Below about 1.2% the plate is too soft to streak; above 2% it turns rubbery.
Can you use gelatin instead? No, for two reasons: it liquefies around 95°F (35°C), below body temperature, turning warm-incubated plates to soup, and common bacteria — Bacillus, Pseudomonas, Proteus, Serratia — secrete gelatinase and digest it into craters. Gelatin is what Koch’s lab used before switching to agar in 1882, for exactly these reasons.
One medium to name and skip: blood agar, designed to reveal hemolytic pathogens like Streptococcus pyogenes — not something a home hobbyist should be deliberately culturing.
How to Pour Agar Plates: 7 Steps
Step 1: Weigh the agar (1.5% w/v)
Formula: grams of agar = milliliters of water × 0.015. For 500 mL (a little over 2 cups): agar is 500 × 0.015 = 7.5 g, and nutrient base at 8 g/L is 500 × 0.008 = 4 g. That yields about 25 plates at 20 mL each. Backward: 10 plates needs 10 × 20 mL = 200 mL of water, so 3 g of agar. Stir the powder into cold water to a slurry before heating — dump it into boiling water and it clumps into lumps that never dissolve.

Step 2: Dissolve it at a full rolling boil
Agar won’t dissolve below about 185–195°F (85–90°C), so it needs a full rolling boil. Watch it turn from cloudy to clear amber, like weak tea — that clarity means it’s fully dissolved. For small batches, microwave in 20–30 second bursts, swirling between, since agar boils over without warning.
Step 3: Sterilize at 15 psi for 15–20 minutes
Boiling at 212°F (100°C) is not sterilization. It kills vegetative cells, but bacterial endospores — from genera like Bacillus and Clostridium — survive boiling for hours, per NIH-published aseptic technique protocols. A boiled-only batch often grows a spreading, wrinkled Bacillus film a week later — the sign of under-sterilized medium. True sterilization needs 250°F (121°C) at 15 psi for 15–20 minutes; a stovetop pressure cooker at 15 psi reaches exactly that. Don’t fill jars past two-thirds full, and loosen the lids first.
Step 4: Cool to 50°C before you pour
Cool the sterilized medium to about 122°F (50°C) — hot enough to only hold the flask against your wrist briefly. Too hot and condensation pools on the lid; too cool and it sets mid-pour in lumps. Lay out dish bottoms with lids ajar before taking the flask off the heat — you’ll have only 10–15 minutes before it thickens in the neck.

Step 5: Pour about 20 mL per plate
Aim for 20–25 mL per 100 mm dish, about 4 mm deep. Lift the lid just enough for the stream, holding it at an angle like a shield rather than setting it face-up on the bench. A correctly poured plate is glass-smooth with a faint amber tint you can read newsprint through; a bad pour shows a dimpled, orange-peel surface or rippling.
Step 6: Let them set, then dry the surface
Leave plates undisturbed on a level surface for 30–45 minutes, then dry the surface: lids ajar for about 30 minutes, or inverted in a warm spot for 15–30 minutes. Surface moisture causes swarming organisms to spread into one film instead of discrete colonies. That’s also why plates are always incubated upside down, so condensation collects on the lid instead of the agar.
Step 7: Store them inverted at 4°C
Stack finished plates inverted in a sealed bag in the refrigerator at 39°F (4°C). Realistic shelf life is 2–4 weeks; discard any plate showing growth, dried edges, or agar pulled away from the wall.
How to Streak a Plate for Single Colonies
A streak plate works by progressive dilution: each pass spreads the sample thinner, until the final quadrant leaves individual cells far enough apart to grow into isolated colonies. Each colony is the clonal descendant of a single colony-forming unit, which is what makes it useful for subculturing later.
Where to get a sample
Good sources: a doorknob, a phone screen, garden soil, pond water under the microscope, plain yogurt, or a swabbed leaf. Off-limits: wounds, feces, or medical samples — this is hobby microbiology, not diagnostic work, and no home colony identifies anything with certainty.
The four-quadrant streak
Divide the plate mentally into four quadrants, per Addgene’s streak plate protocol. Streak quadrant 1 heavily, then flame the loop and let it cool for 10–15 seconds. Drag 3–4 strokes from quadrant 1 into quadrant 2, then flame and cool again. Repeat the flame-and-cool step between quadrant 2 into 3, and quadrant 3 into 4, without ever returning to an earlier quadrant. A loop straight from the flame is red hot and will incinerate the sample — touch a bare edge first, and a faint hiss means wait longer. Hold it at a shallow 20–45° angle, like a violin bow, almost no pressure; gouging the agar is the #1 beginner error, burying growth where you can’t sample it.
Quadrant 1 grows as a continuous confluent smear. By quadrant 4 you should see discrete pinhead-sized dots, spaced like scattered sesame seeds. That transition is the whole point, and seeing it the first time is the payoff moment.
The easier swab-and-spread method
No loop? A sterile cotton swab rolled gently across quadrant 1 works for environmental samples, with a fresh swab for the flame-and-drag pattern on the rest. For liquid samples, pipette about 100 µL of a diluted sample onto the center and spread it with a sterile bent-glass or disposable spreader.
Incubating Safely: Why 37°C Is the Wrong Answer
Environmental and home samples should incubate at room temperature, 68–77°F (20–25°C) — never at 98.6°F (37°C). Body temperature selects for organisms already adapted to grow in humans, so warmer incubation specifically favors potential pathogens over the harmless bacteria you started with. This is the core safety rule behind the hobby, per the American Society for Microbiology’s biosafety guidelines for teaching laboratories.
Tape the lid shut with two small tabs before incubating, and don’t reopen it afterward. Room temperature gives visible colonies in 2–3 days versus 24–48 hours at 98.6°F — the trade-off that makes warmer incubation wrong: faster is not safer. Molds take 3–5 days then spread aggressively; yeasts land around 2–3 days too.
Treat every plate as if it contains something you wouldn’t want on your hands: disinfect the work surface, and wash your hands before and after. Never sniff a plate — that aerosolizes spores directly into your airway. Keep plates away from toddlers or immunocompromised household members.
Reading Your Plate: Bacteria, Yeast, or Mold?
A standard vocabulary turns a vague blob into a real observation: form (circular, irregular, filamentous, rhizoid), elevation (flat, raised, convex, umbonate), margin (entire, undulate, lobate, filiform), surface (smooth, dull, rough, wrinkled), opacity (transparent, translucent, opaque). Color often gives it away — Serratia marcescens comes up salmon-pink to brick-red at room temperature (suppressed at 37°C), Micrococcus luteus is bright yellow, and Bacillus subtilis forms a dull cream, spreading film rather than discrete colonies.
| Bacterial colony | Yeast colony | Mold colony | |
|---|---|---|---|
| Look | Small, 1–3 mm, shiny, wet, sharp edge | Larger, 3–5 mm, creamy, matte, domed | Fuzzy, filamentous, spreading, 10 mm+ within days |
| Color | Cream, white, yellow, pink, red | Off-white to cream | Green, blue-green, black, gray, white |
| Texture | Buttery, slides under the loop | Buttery, thicker | Cottony or velvety; powdery when sporulating |
| Growth speed | 1–3 days | 2–3 days | 3–5 days, then overruns everything |
Bacterial and mold colonies under a microscope look so different because of the difference between prokaryotes and eukaryotes. Bacteria are simple cells dividing in place, while molds and yeasts are eukaryotic and grow as branching filaments or budding cells. Chasing a specific organism? See bread mold under a microscope, identifying Penicillium, telling Aspergillus from Penicillium, or a plain yeast colony under the microscope for comparison.
From a Colony to a Microscope Slide
A visible colony is millions of cells, but a single bacterial cell measures only 0.5–2 µm, needing the 100x oil-immersion objective — 1000x total — to resolve at all. Unstained bacteria in brightfield are nearly invisible against the mounting medium. You need a stain, or dark field microscopy or phase contrast, to see what bacteria actually look like under a microscope.
For a quick look, a wet mount is fastest: a drop of water on the slide, barely touch the colony with a sterile loop or toothpick, swirl it in, coverslip. The universal mistake is too much sample — a visible smear becomes an opaque brown blob at 1000x instead of individual rods. A clean-looking loop afterward means you got it right. See our walkthrough on making a wet mount slide for the general technique.
For staining, prepare a heat-fixed smear instead: loopful of water on the slide, touch the colony, emulsify, and spread thin over a coin-sized area. Let it air dry completely, then pass it through a flame two to three times. Don’t heat until the slide is hot to the touch, which distorts the cells. Next comes a Gram stain, which sorts bacteria into Gram-positive and Gram-negative groups by cell wall structure.
7 Mistakes That Ruin a First Batch
| Symptom | Cause | Fix |
|---|---|---|
| Gritty lumps, never dissolves | Agar sprinkled into boiling water | Add to cold water, stir to a slurry, then boil |
| Furrow or trench in the agar | Pressing the loop like a pen | Hold it like a violin bow, weight of the tool only |
| Scorched track, dead sample | Red-hot loop straight from the flame | Count to fifteen, or test on a bare edge first |
| Opaque brown mass at 1000x | Too much colony on the slide | Barely touch the colony — loop should look clean after |
| Agar never sets, stays soupy | Under-weighed agar (below ~1.2% w/v), or gelatin used instead | Weigh to 1.5% w/v — 15 g per liter — on a 0.1 g scale; gelatin will not set at room temperature |
| Same fuzzy mold on every plate | Lid left off during the pour too long | Lift the lid only enough to admit the stream |
| Wrinkled cream film, not colonies | Boiled but never pressure-cooked | Sterilize at 15 psi for 15–20 minutes, every batch |
How to Dispose of Agar Plates Safely
Disposal is a safety step, not an afterthought. Never wash a used plate in the sink — re-set agar clogs drains and puts live culture into the plumbing, and never reopen a moldy plate to inspect it. Pressure-cook the sealed plate at 15 psi for 15–20 minutes, or soak it in a 1:10 dilution of household bleach — about 0.5% available chlorine, the concentration the CDC’s disinfection and sterilization guideline specifies for blood spills — for 20–30 minutes. Then bag it and trash it — never compost, and never skip decontamination just because a colony looks harmless.
Frequently Asked Questions
Why do you incubate petri dishes upside down?
Inverting the dish keeps condensation on the lid instead of dripping onto the growth surface and smearing colonies together.
How long do agar plates last in the fridge?
About 2–4 weeks, bagged and inverted at 39°F (4°C). Discard any plate showing growth, dried edges, or agar pulled away from the wall.
Can you reuse petri dishes?
Disposable polystyrene dishes are single-use and will melt in a pressure cooker. Borosilicate glass dishes are reusable and autoclavable, but cost roughly ten times as much.
Do you need an autoclave to make agar plates?
No — a stovetop pressure cooker at 15 psi reaches the same 250°F (121°C) a lab autoclave does.
What is the difference between agar and a petri dish?
Agar is the nutrient jelly itself; the Petri dish is the lidded vessel that holds it. You need both to grow a visible culture.
Conclusion
Making your first batch of agar plates closes the gap between owning a microscope and having something worth putting under it: weigh, dissolve, pressure-cook, pour, streak, and wait. Within a few days you go from an empty dish to real colonies you can identify, subculture, and see at 1000x. Every failure point here is predictable and has a fix, so a ruined first batch is just information for the second one.
Have you poured your first plate yet? Tell us what grew — and what color surprised you — in the comments below.